
 RxJS和Interceptor
RxJS 是一个组织异步逻辑的库,它有很多 operator,可以极大的简化异步逻辑的编写。
它是由数据源产生数据,经过一系列 operator 的处理,最后传给接收者。
这个数据源叫做 observable。
比如这样:
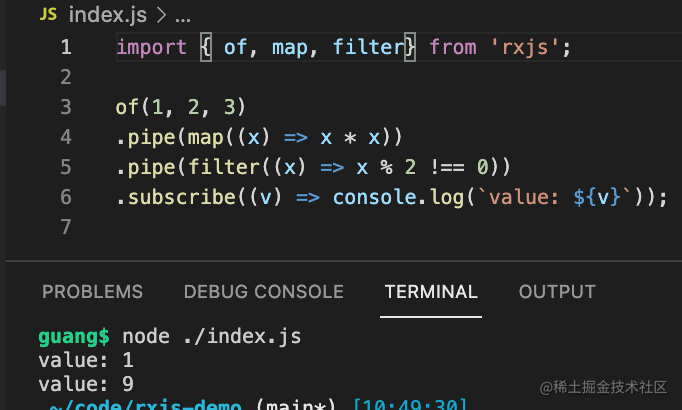
import { of, filter, map } from 'rxjs';

of(1, 2, 3)
.pipe(map((x) => x * x))
.pipe(filter((x) => x % 2 !== 0))
.subscribe((v) => console.log(`value: ${v}`));
2
3
4
5
6
用 node 跑一下,结果如下:
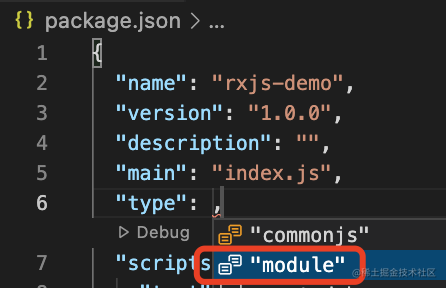
这里 node 能直接解析 esm 需要在 package.json 里设置 type 为 module:
这就是 map、filter 的 operator 的作用。
还是很容易理解的。
有同学说,这样的逻辑自己写也行呀。
那这种呢:
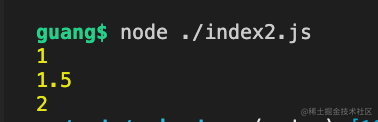
import { of, scan, map } from 'rxjs';

const numbers$ = of(1, 2, 3);

numbers$
  .pipe(
    scan((total, n) => total + n),
    map((sum, index) => sum / (index + 1))
  )
  .subscribe(console.log);
2
3
4
5
6
7
8
9
10
scan 是计数,map 是转换,结果如下:
或者是节流、防抖:
import { fromEvent, throttleTime } from 'rxjs';

const clicks = fromEvent(document, 'click');
const result = clicks.pipe(throttleTime(1000));

result.subscribe(x => console.log(x));
2
3
4
5
6
import { fromEvent, debounceTime } from 'rxjs';

const clicks = fromEvent(document, 'click');
const result = clicks.pipe(debounceTime(1000));
result.subscribe(x => console.log(x));
2
3
4
5
有同学说,这些逻辑都很简单呀,完全可以自己写。
没错,一般异步逻辑自己写也行。
但是架不住 RxJS 的 operator 多呀,组合起来可以实现非常复杂的异步逻辑处理。
可以在官网文档看到所有的 operator (opens new window)。
所以说,如果异步逻辑复杂度高了,那上 RxJS 收益还是很高的,异步逻辑的编写就变成了 operator 的组合,少写很多代码。
感受到为啥要用 RxJS 了么?
也是因为这个原因,Nest 的 interceptor 集成了 RxJS,可以用它来处理响应。
当然,也有人觉得这里没必要用 RxJS。
但既然 Nest 支持了,我们就用用看,基于那一堆 operator 确实是能简化异步逻辑的。
创建一个测试项目:
nest new interceptor-test -p npm
进入目录执行 nest g interceptor:
nest g interceptor aaa --flat --no-spec
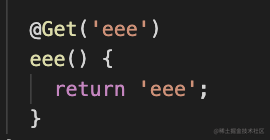
我们可以这样实现接口耗时统计:
import { CallHandler, ExecutionContext, Injectable, NestInterceptor } from '@nestjs/common';
import { Observable, tap } from '0rxjs';

@Injectable()
export class AaaInterceptor implements NestInterceptor {

  intercept(context: ExecutionContext, next: CallHandler): Observable<any> {
    const now = Date.now();
    return next
      .handle()
      .pipe(
        tap(() => console.log(`After... ${Date.now() - now}ms`)),
      );
  }
}
2
3
4
5
6
7
8
9
10
11
12
13
14
15
tap operator 不会改变数据,只是额外执行一段逻辑。
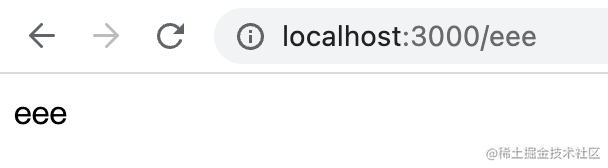
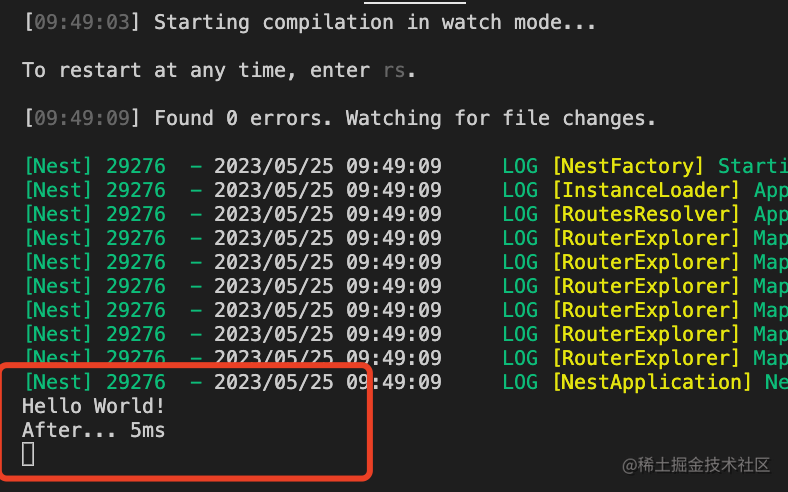
在 handler 上启用 interceptor:
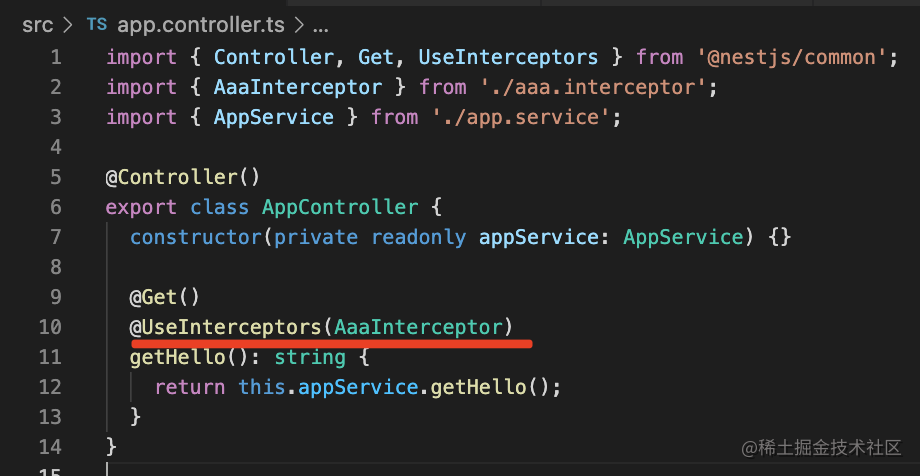
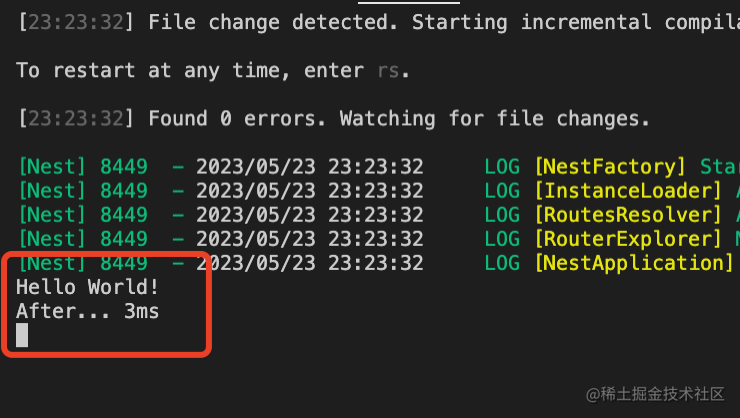
然后浏览器访问 http://localhost:3000 (opens new window)

就会看到打印的耗时数据:
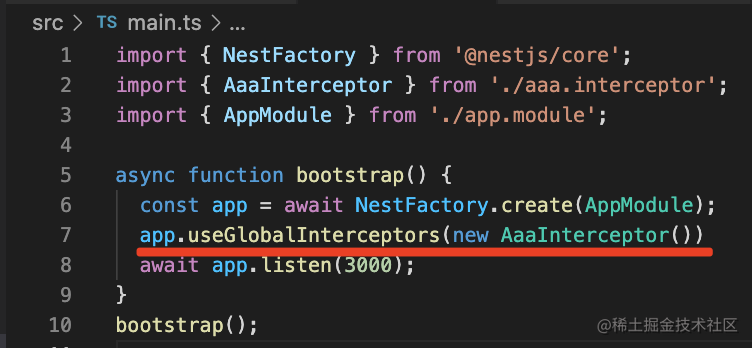
或者全局启用这个 interceptor:
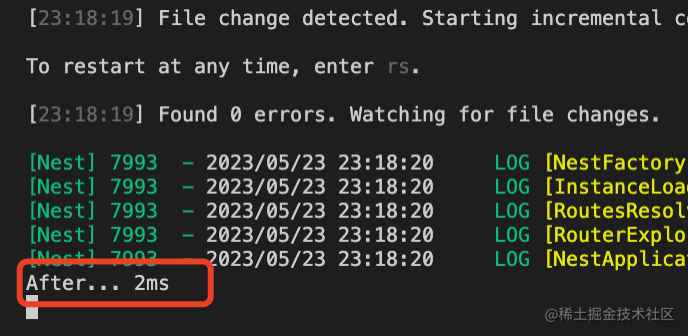
路由级别和全局级别的 interceptor 还是有区别的,路由级别的可以注入依赖,而全局的不行:
我们再来使用下别的 RxJS operator:
其实适合在 Nest 的 interceptor 里用的 operator 还真不多,也就这么几个:
# map
再生成一个 interceptor:
nest g interceptor map-test --flat --no-spec
使用 map operator 来对 controller 返回的数据做一些修改:
import { CallHandler, ExecutionContext, Injectable, NestInterceptor } from '@nestjs/common';
import { map, Observable } from 'rxjs';

@Injectable()
export class MapTestInterceptor implements NestInterceptor {
  intercept(context: ExecutionContext, next: CallHandler): Observable<any> {
    return next.handle().pipe(map(data => {
      return {
        code: 200,
        message: 'success',
        data
      }
    }))
  }
}
2
3
4
5
6
7
8
9
10
11
12
13
14
15
在 controller 里引入下:
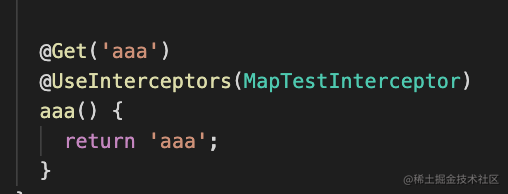
跑下试试:
现在返回的数据就变成了这样。
map 算是在 nest interceptor 里必用的 rxjs operator 了
# tap
再生成个 interceptor
nest g interceptor tap-test --flat --no-spec
使用 tap operator 来添加一些日志、缓存等逻辑:
import { AppService } from './app.service';
import { CallHandler, ExecutionContext, Injectable, Logger, NestInterceptor } from '@nestjs/common';
import { Observable, tap } from 'rxjs';

@Injectable()
export class TapTestInterceptor implements NestInterceptor {
  constructor(private appService: AppService) {}

  private readonly logger = new Logger(TapTestInterceptor.name);

  intercept(context: ExecutionContext, next: CallHandler): Observable<any> {
    return next.handle().pipe(tap((data) => {

      // 这里是更新缓存的操作,这里模拟下
      this.appService.getHello();

      this.logger.log(`log something`, data);
    }))
  }
}
2
3
4
5
6
7
8
9
10
11
12
13
14
15
16
17
18
19
20
因为还没讲到缓存那块,这里就调用 service 方法模拟了下。
日志记录我们用的 nest 内置的 Logger,在 controller 返回响应的时候记录一些东西。
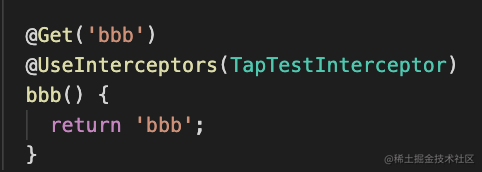
浏览器访问这个接口,会打印日志:

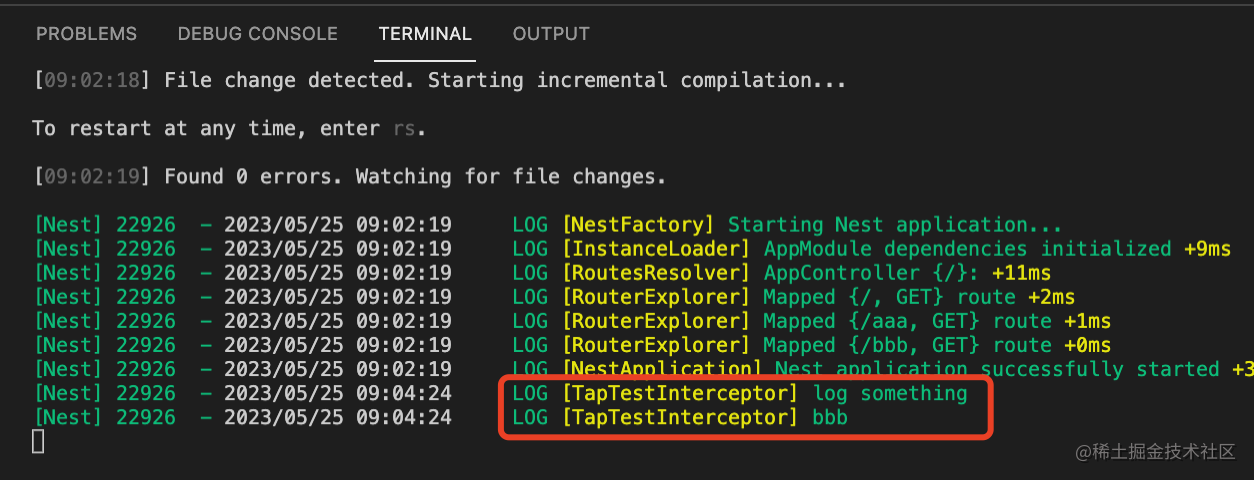
这里我们用的是 Nest 内置的 Logger,所以打印格式是这样的。
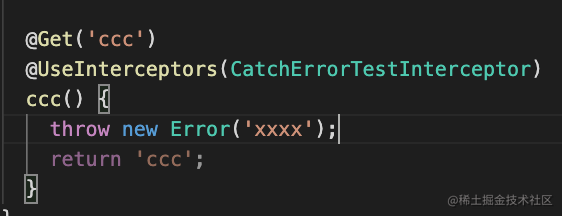
# catchError
controller 里很可能会抛出错误,这些错误会被 exception filter 处理,返回不同的响应,但在那之前,我们可以在 interceptor 里先处理下。
生成 interceptor:
nest g interceptor catch-error-test --flat --no-spec
使用 catchError 处理抛出的异常:
import { CallHandler, ExecutionContext, Injectable, Logger, NestInterceptor } from '@nestjs/common';
import { catchError, Observable, throwError } from 'rxjs';

@Injectable()
export class CatchErrorTestInterceptor implements NestInterceptor {
  private readonly logger = new Logger(CatchErrorTestInterceptor.name)

  intercept (context: ExecutionContext, next: CallHandler): Observable<any> {
    return next.handle().pipe(catchError(err => {
      this.logger.error(err.message, err.stack)
      return throwError(() => err)
    }))
  }
}
2
3
4
5
6
7
8
9
10
11
12
13
14
这里我们就是日志记录了一下,当然你也可以改成另一种错误,重新 throwError。
在 controller 里用一下:
浏览器访问下,可以看到返回 500 的错误:
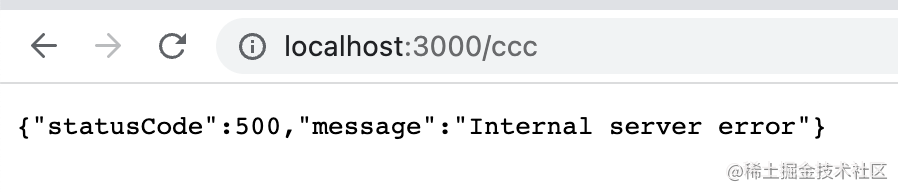
打印了两次错误:
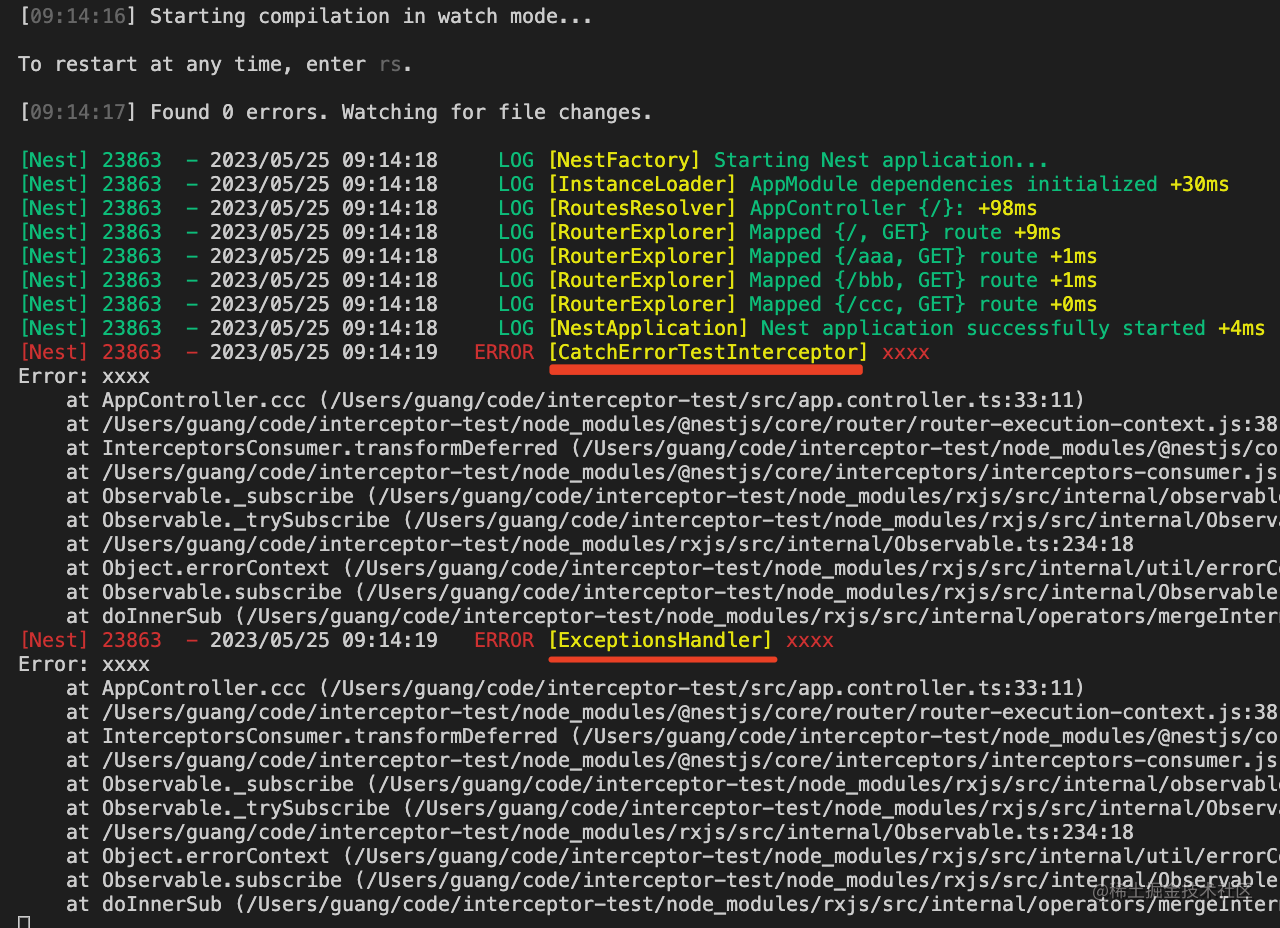
一次是我们在 interceptor 里打印的,一次是 exception filter 打印的。
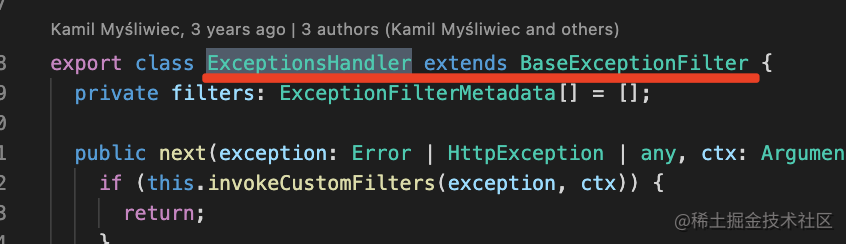
其实我们能看到这个 500 错误,就是内置的 exception filter 处理的:
对应的 Nest 源码如下:

# timeout
接口如果长时间没返回,要给用户一个接口超时的响应,这时候就可以用 timeout operator。
我们再创建个 nest interceptor
nest g interceptor timeout --flat --no-spec
添加如下逻辑:
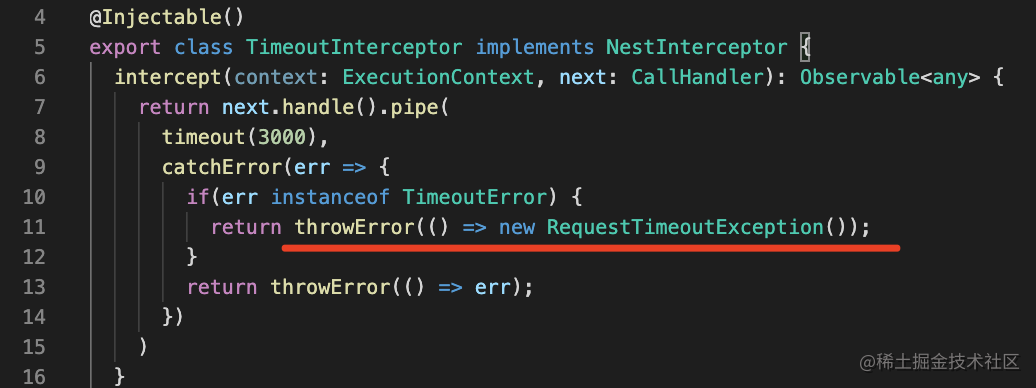
import { CallHandler, ExecutionContext, Injectable, NestInterceptor, RequestTimeoutException } from '@nestjs/common';
import { catchError, Observable, throwError, timeout, TimeoutError } from 'rxjs';

@Injectable()
export class TimeoutInterceptor implements NestInterceptor {
  intercept(context: ExecutionContext, next: CallHandler): Observable<any> {
    return next.handle().pipe(
      timeout(3000),
      catchError(err => {
        if(err instanceof TimeoutError) {
          console.log(err);
          return throwError(() => new RequestTimeoutException());
        }
        return throwError(() => err);
      })
    )
  }
}
2
3
4
5
6
7
8
9
10
11
12
13
14
15
16
17
18
timeout 操作符会在 3s 没收到消息的时候抛一个 TimeoutError。
然后用 catchError 操作符处理下,如果是 TimeoutError,就返回 RequestTimeoutException,这个有内置的 exception filter 会处理成对应的响应格式。
其余错误就直接 throwError 抛出去。
在 controller 里用一下:
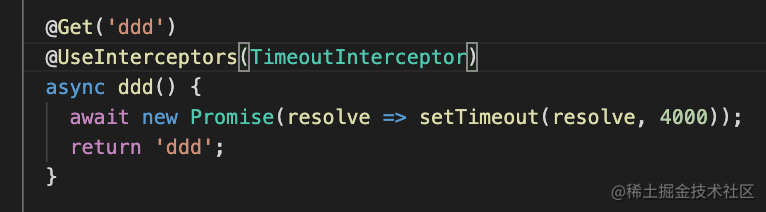
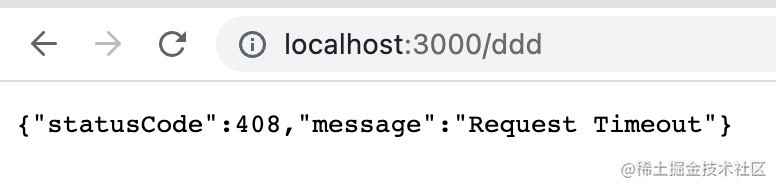
浏览器访问,3s 后返回 408 响应:
就是在这里处理的:
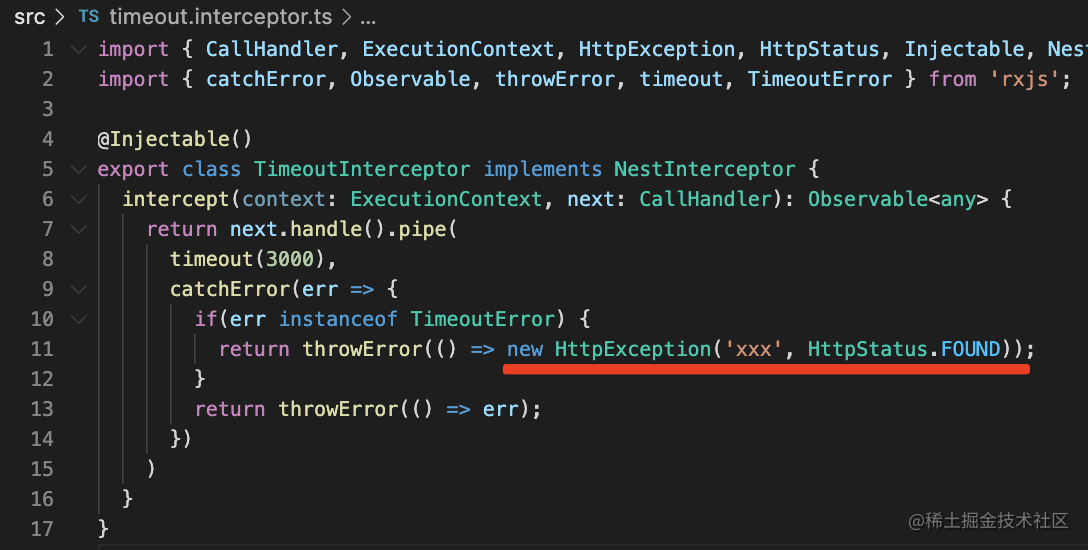
不信可以抛一个其他的 exception 试一下:
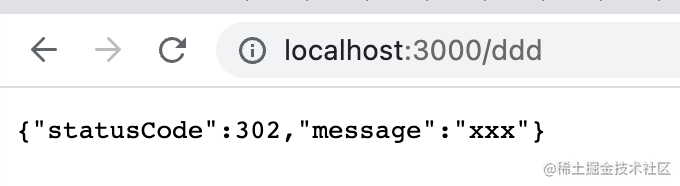
最后,再来看下全局的 interceptor:
因为这种是手动 new 的,没法注入依赖。
但很多情况下我们是需要全局 interceptor 的,而且还用到一些 provider,怎么办呢?
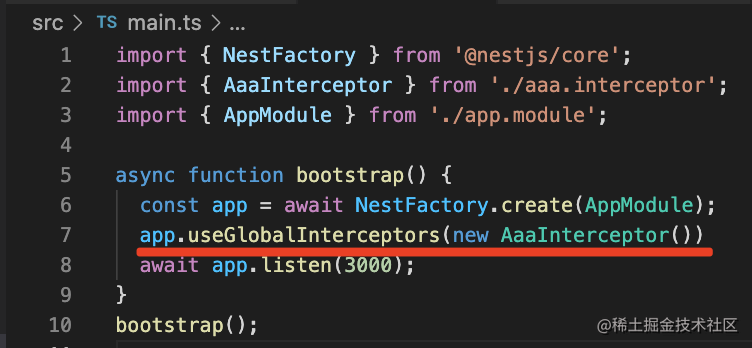
nest 提供了一个 token,用这个 token 在 AppModule 里声明的 interceptor,Nest 会把它作为全局 interceptor:
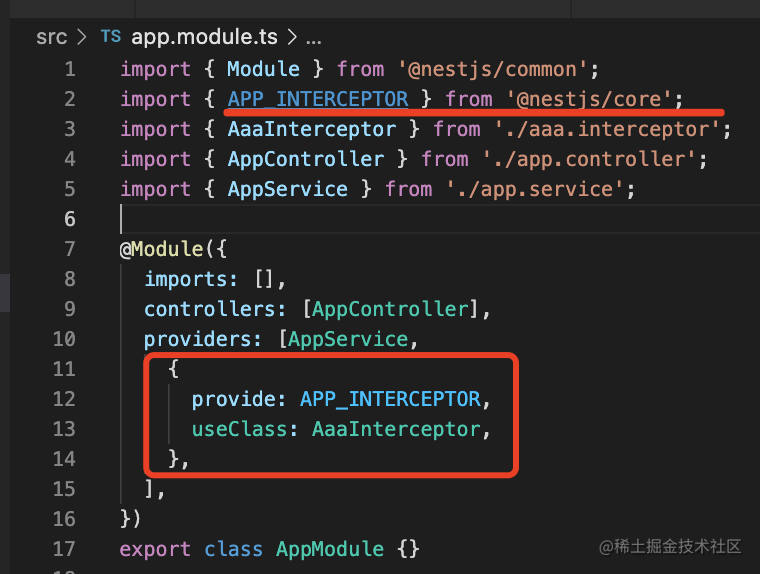
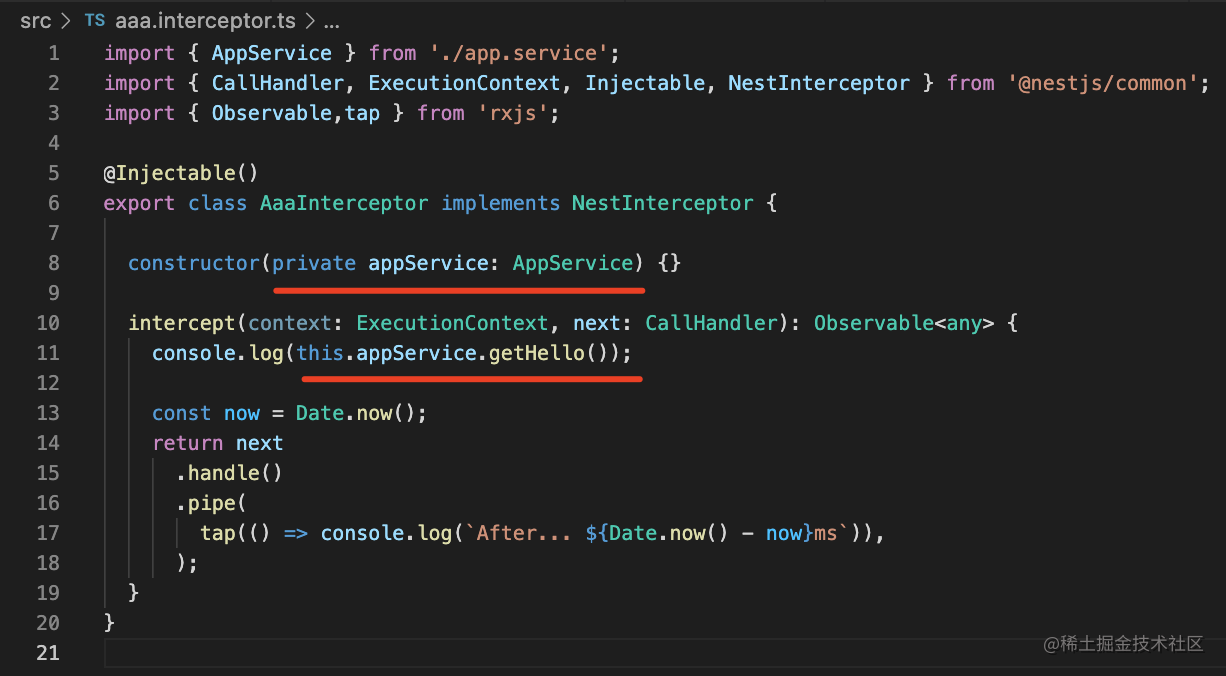
在这个 interceptor 里我们注入了 appService:
添加一个路由:
访问下:
可以看到全局 interceptor 生效了,而且这个 hello world 就是注入的 appService 返回的:
案例代码在小册仓库 (opens new window)。
# 总结
rxjs 是一个处理异步逻辑的库,它的特点就是 operator 多,你可以通过组合 operator 来完成逻辑,不需要自己写。
nest 的 interceptor 就用了 rxjs 来处理响应,但常用的 operator 也就这么几个:
- tap: 不修改响应数据,执行一些额外逻辑,比如记录日志、更新缓存等
- map:对响应数据做修改,一般都是改成 {code, data, message} 的格式
- catchError:在 exception filter 之前处理抛出的异常,可以记录或者抛出别的异常
- timeout:处理响应超时的情况,抛出一个 TimeoutError,配合 catchErrror 可以返回超时的响应
总之,rxjs 的 operator 多,但是适合在 nest interceptor 里用的也不多。
此外,interceptor 也是可以注入依赖的,你可以通过注入模块内的各种 provider。
全局 interceptor 可以通过 APP_INTERCEPTOR 的 token 声明,这种能注入依赖,比 app.useGlobalInterceptors 更好。
interceptor 是 nest 必用功能,还是要好好掌握的。