
 如何自定义 Exception Filter
# Exception Filter
Exception Filter 是在 Nest 应用抛异常的时候,捕获它并返回一个对应的响应。
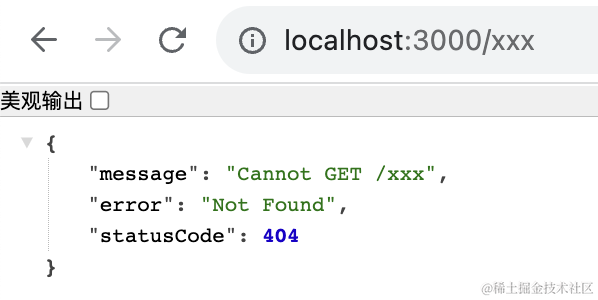
比如路由找不到时返回 404:
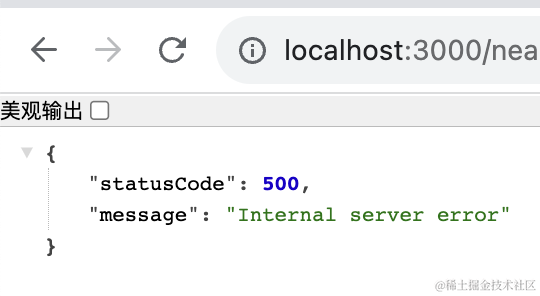
服务端报错时返回 500:
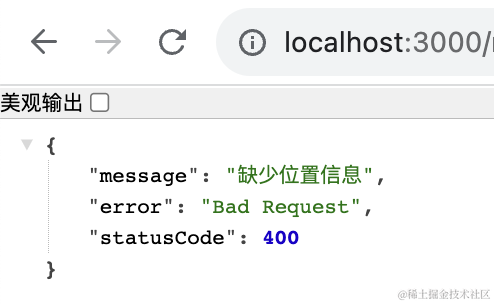
参数的错误返回 400:
这些都是 Exception Filter 做的事情。
那么,如果我们想自定义异常时返回的响应格式呢?
这种就要自定义 Exception Filter 了。
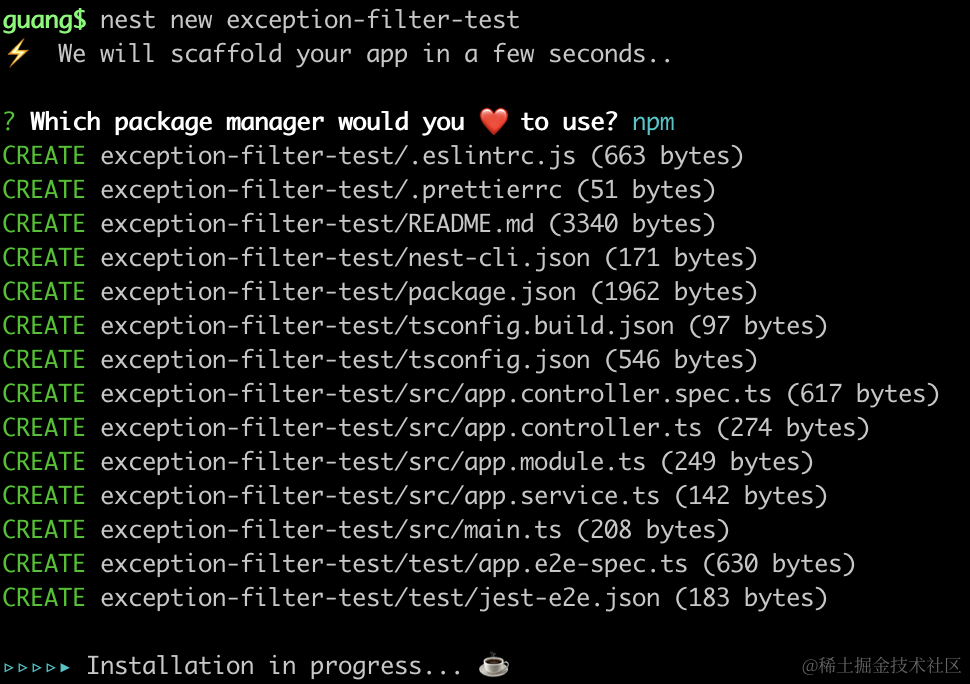
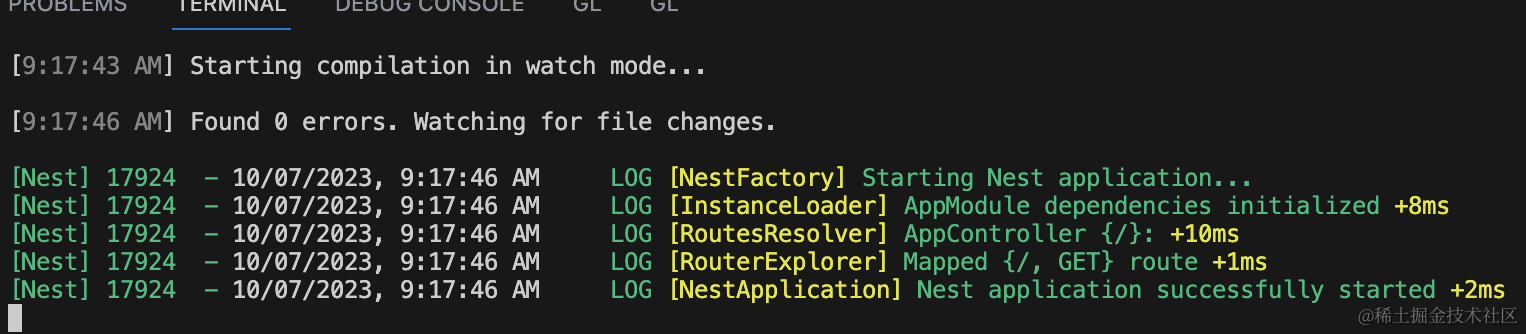
创建个 nest 项目:
nest new exception-filter-test
把它跑起来:
npm run start:dev
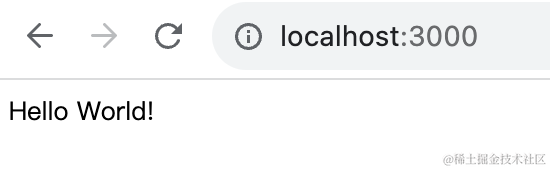
浏览器访问 http://localhost:3000 可以看到 hello world,代表服务跑起来了:
然后在 controller 里抛个异常:
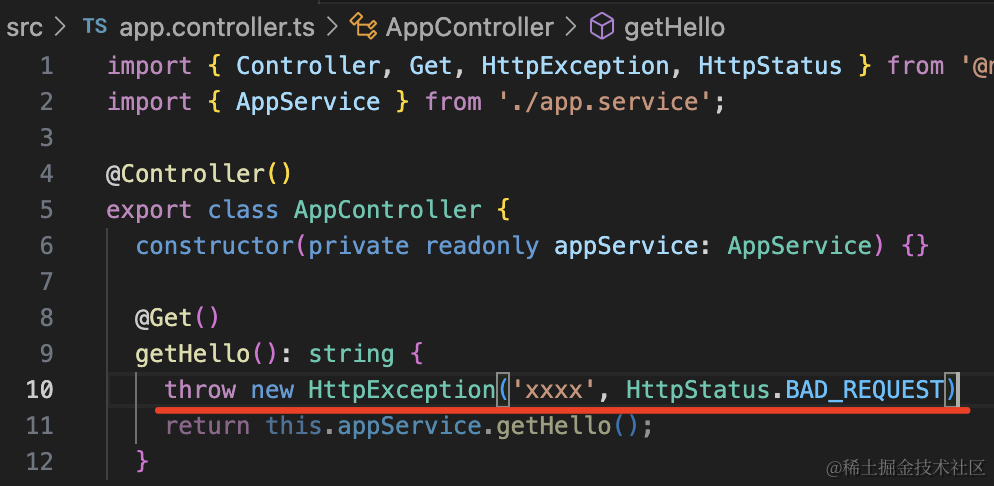
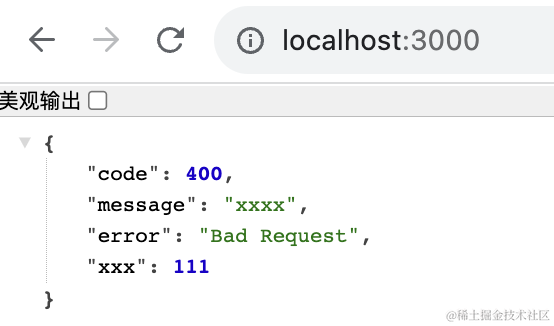
throw new HttpException('xxxx', HttpStatus.BAD_REQUEST)
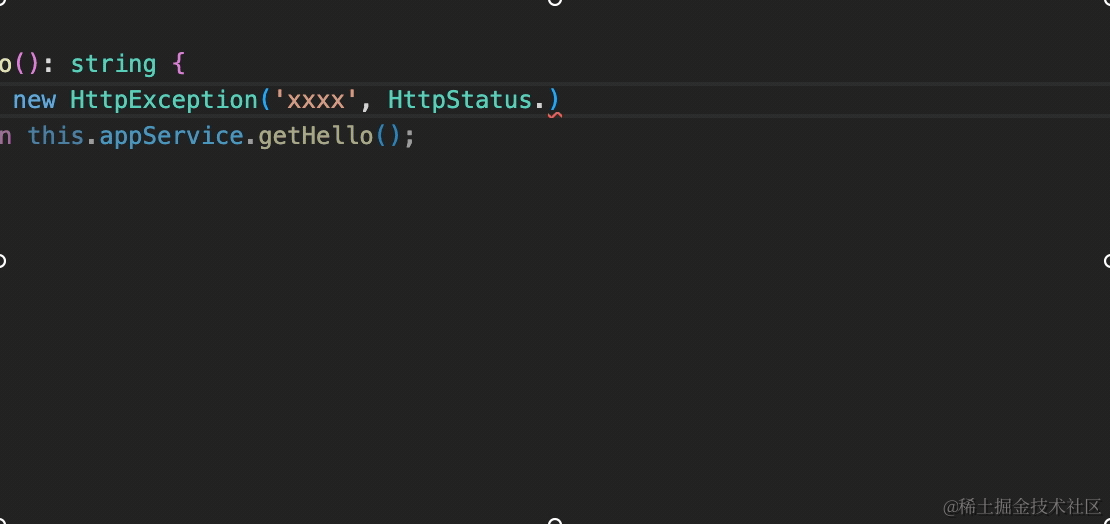
这个 HttpStatus 就是一些状态码的常量:
这时候刷新页面,返回的就是 400 对应的响应:
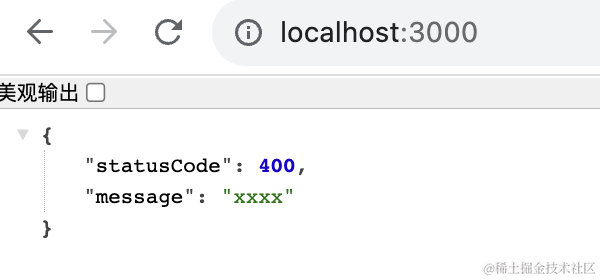
这个响应的格式是内置的 Exception Filter 生成的。
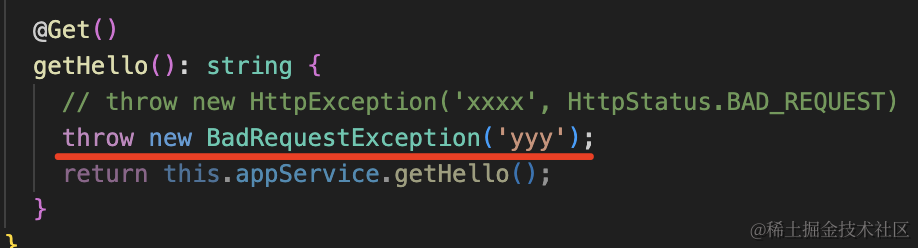
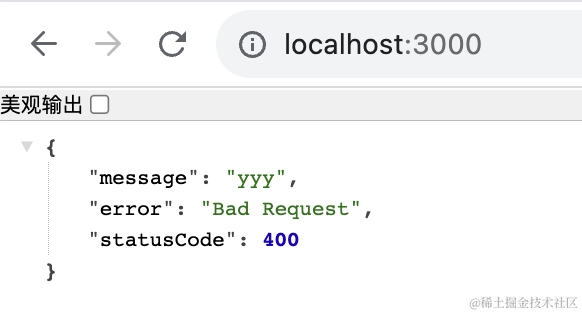
当然,你也可以直接抛具体的异常:
# 自定义 Exception Filter
然后我们自己定义个 exception filter:
nest g filter hello --flat --no-spec
--flat 是不生成 hello 目录,--no-spec 是不生成测试文件。

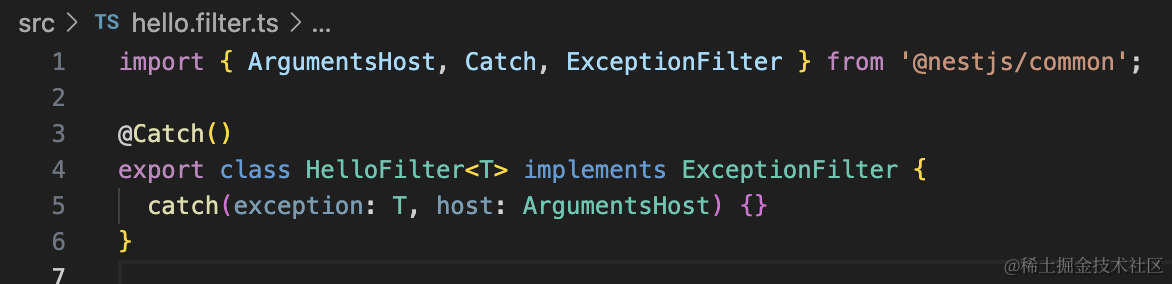
@Catch 指定要捕获的异常,这里指定 BadRequestException。
import { ArgumentsHost, BadRequestException, Catch, ExceptionFilter } from '@nestjs/common';

@Catch(BadRequestException)
export class HelloFilter implements ExceptionFilter {
  catch(exception: BadRequestException, host: ArgumentsHost) {
    debugger;
  }
}
2
3
4
5
6
7
8
先打个断点。
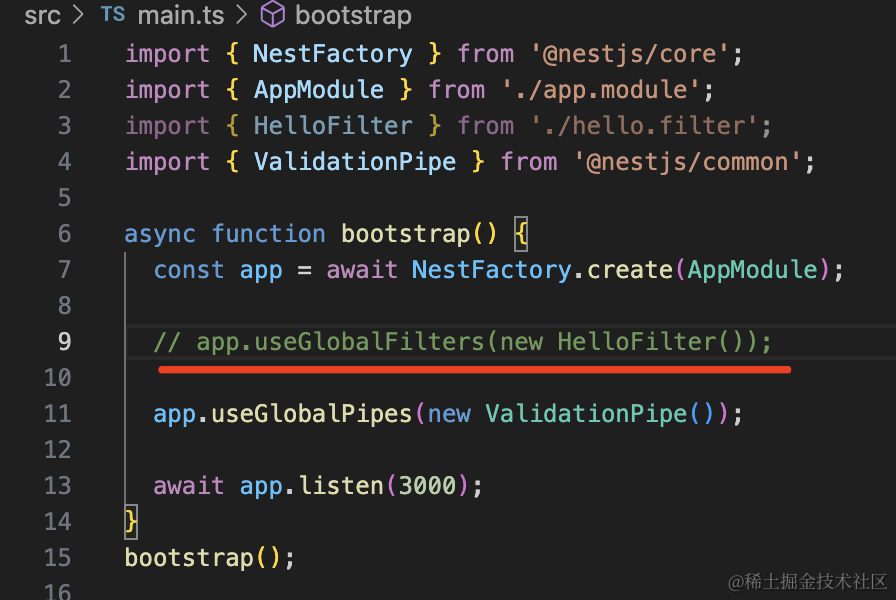
# 全局引用
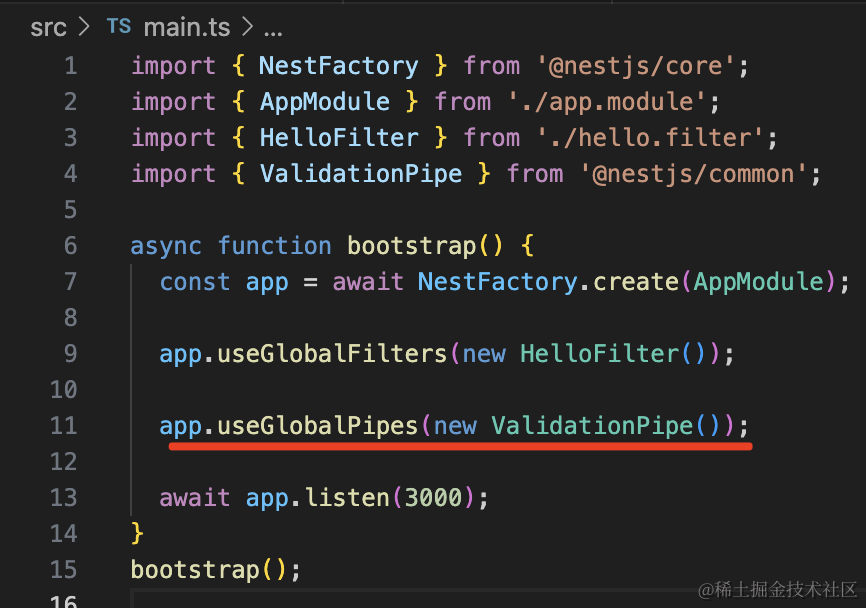
在 AppModule 里引入:
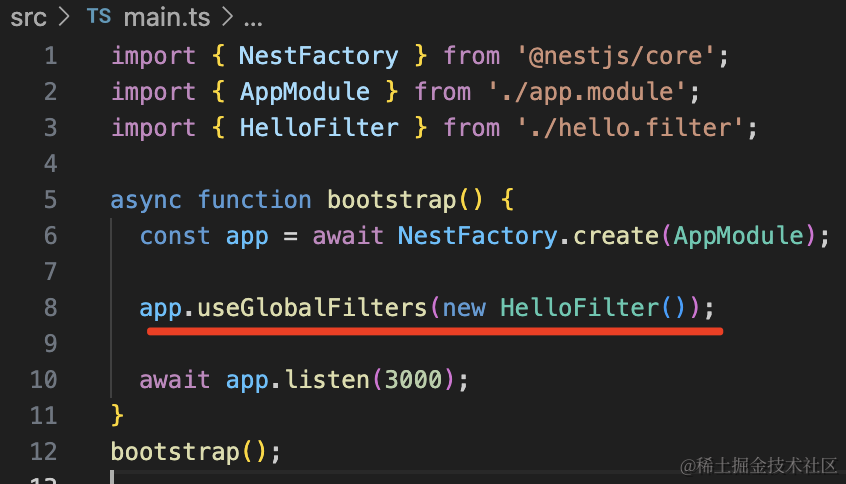
app.useGlobalFilters(new HelloFilter());
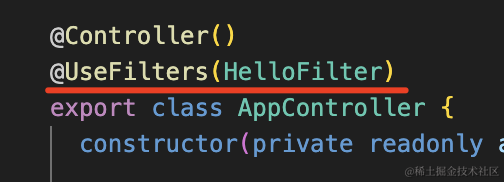
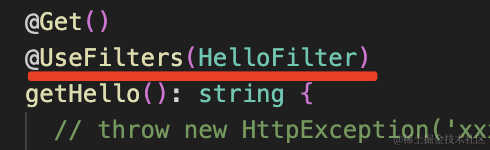
# 局部启用
如果你想局部启用,可以加在 handler 或者 controller 上:
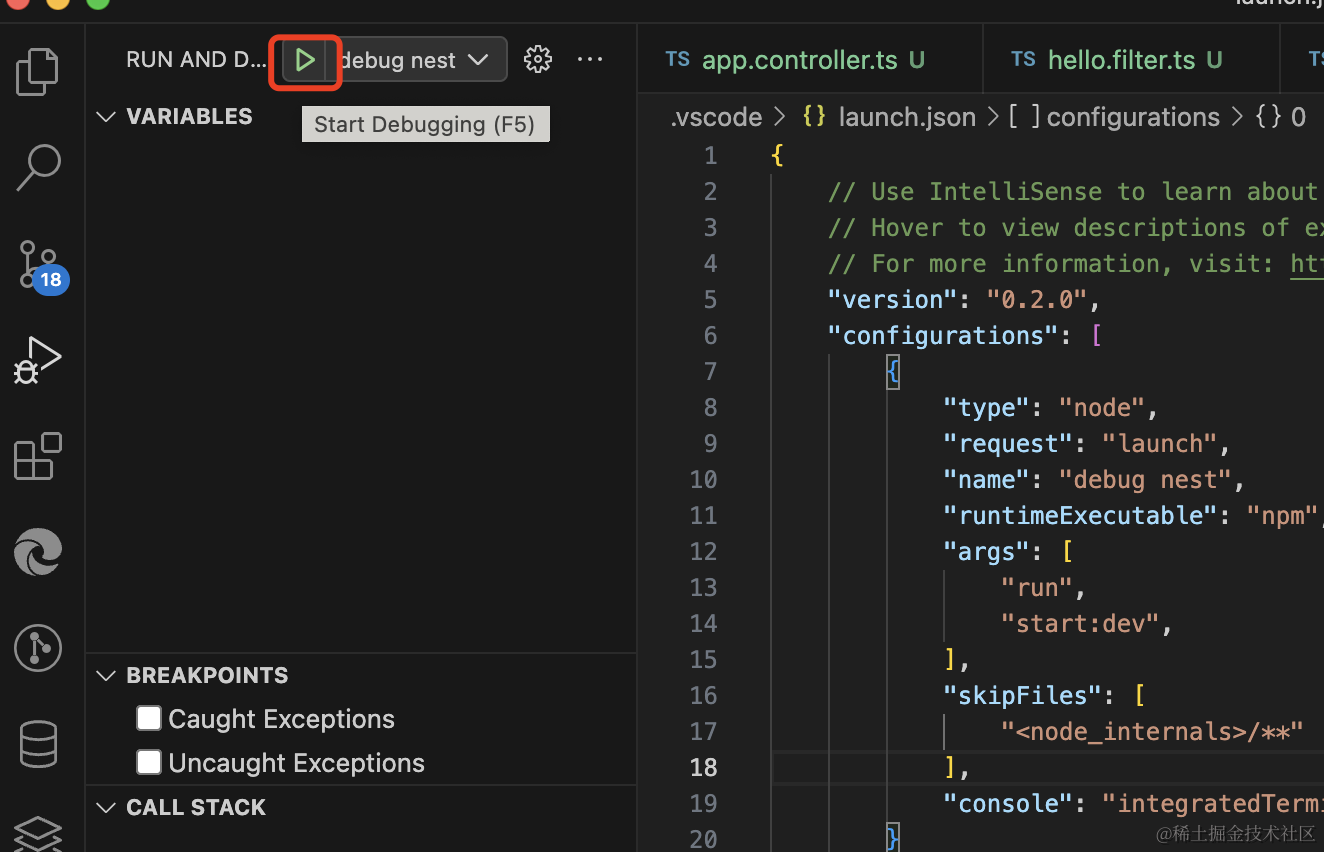
然后新建个调试配置文件:

输入调试配置:
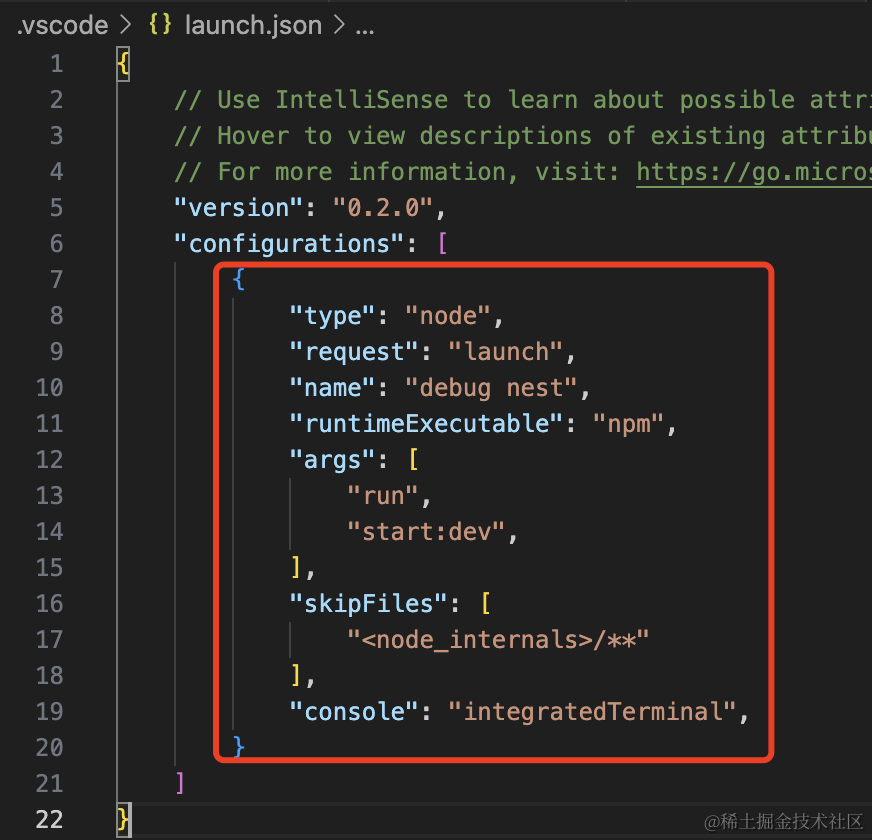
{
    "type": "node",
    "request": "launch",
    "name": "debug nest",
    "runtimeExecutable": "npm",
    "args": [
        "run",
        "start:dev",
    ],
    "skipFiles": [
        "<node_internals>/**"
    ],
    "console": "integratedTerminal",
}
2
3
4
5
6
7
8
9
10
11
12
13
14
把之前的服务关掉,点击调试启动:
刷新页面,代码会在断点处断住:
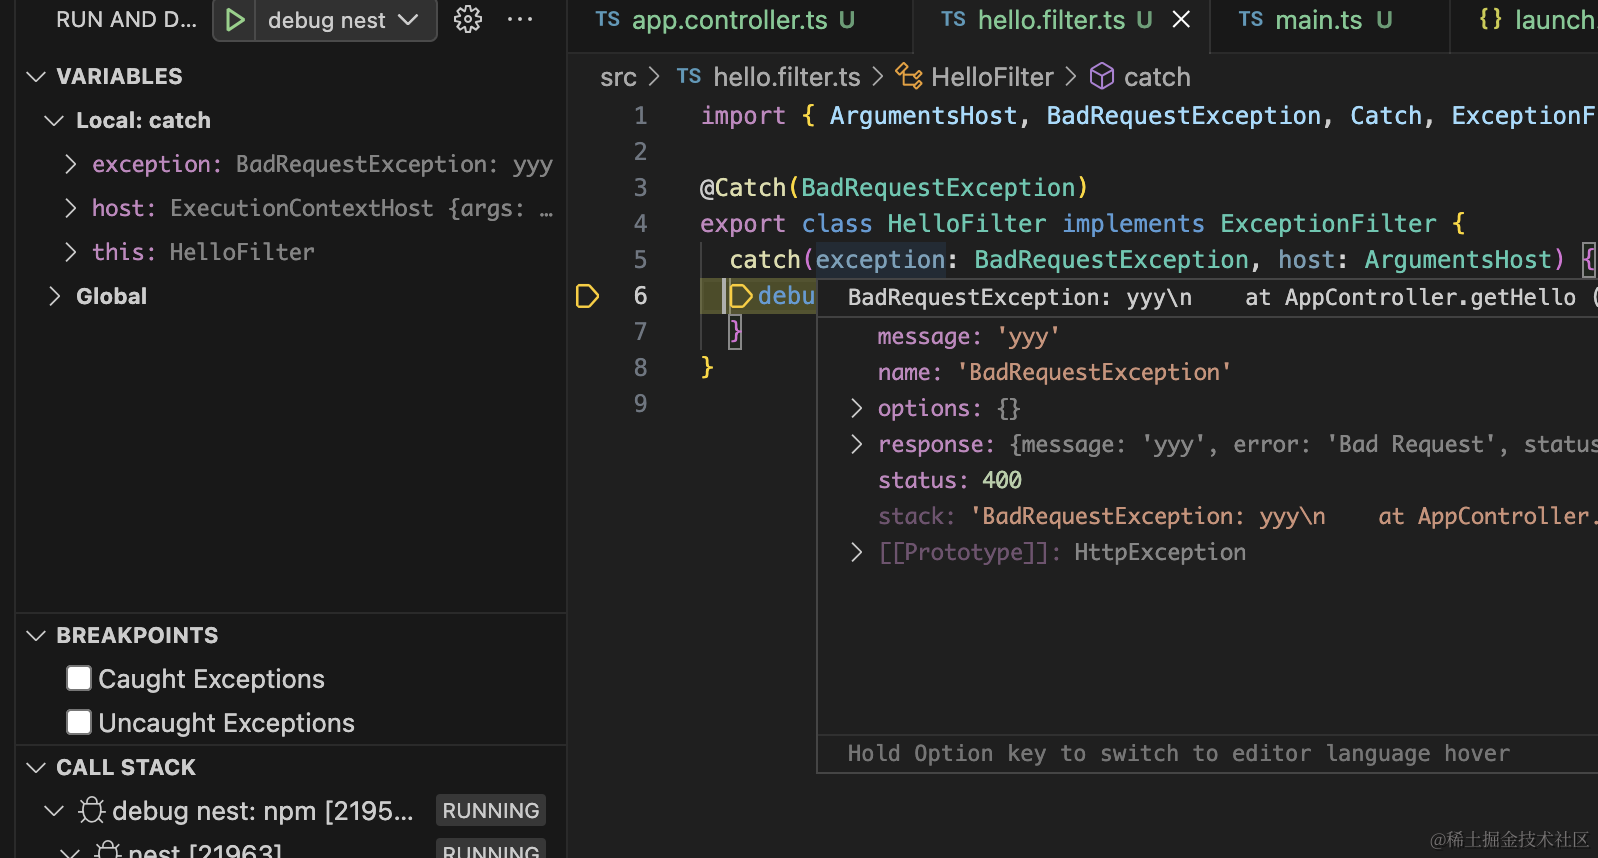
我们只要根据异常信息返回对应的响应就可以了:
import { ArgumentsHost, BadRequestException, Catch, ExceptionFilter, HttpException } from '@nestjs/common';
import { Response } from 'express';
@Catch(BadRequestException)
export class HelloFilter implements ExceptionFilter {
catch(exception: BadRequestException, host: ArgumentsHost) {
const http = host.switchToHttp();
const response = http.getResponse<Response>();
const statusCode = exception.getStatus();
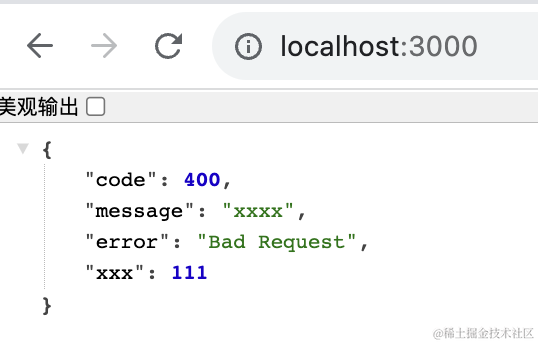
response.status(statusCode).json({
code: statusCode,
message: exception.message,
error: 'Bad Request',
xxx: 111
})
}
}
2
3
4
5
6
7
8
9
10
11
12
13
14
15
16
17
18
19
20
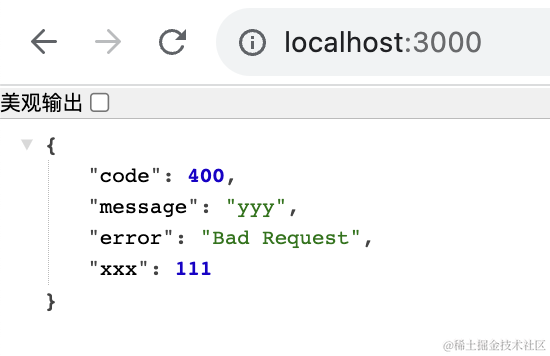
这样,抛异常时返回的响应就是自定义的了:
但我们只是 @Catch 了 BadRequestException
如果抛的是其他异常,依然是原来的格式:
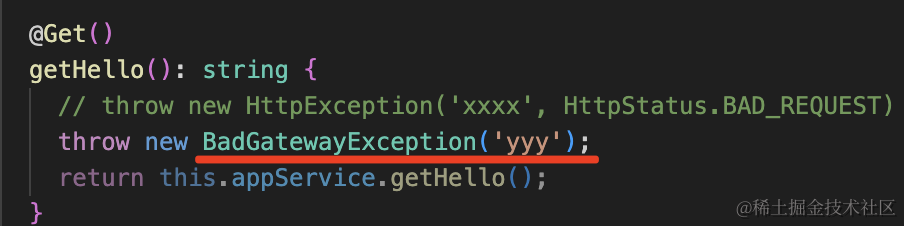
比如我抛一个 BadGatewayException。
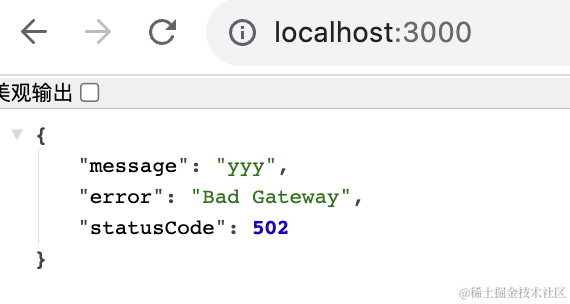
依然是默认格式。
# 捕捉所有错误类型
那我们只要 @Catch 指定 HttpException 不就行了?
因为 BadRequestExeption、BadGateWayException 等都是它的子类。
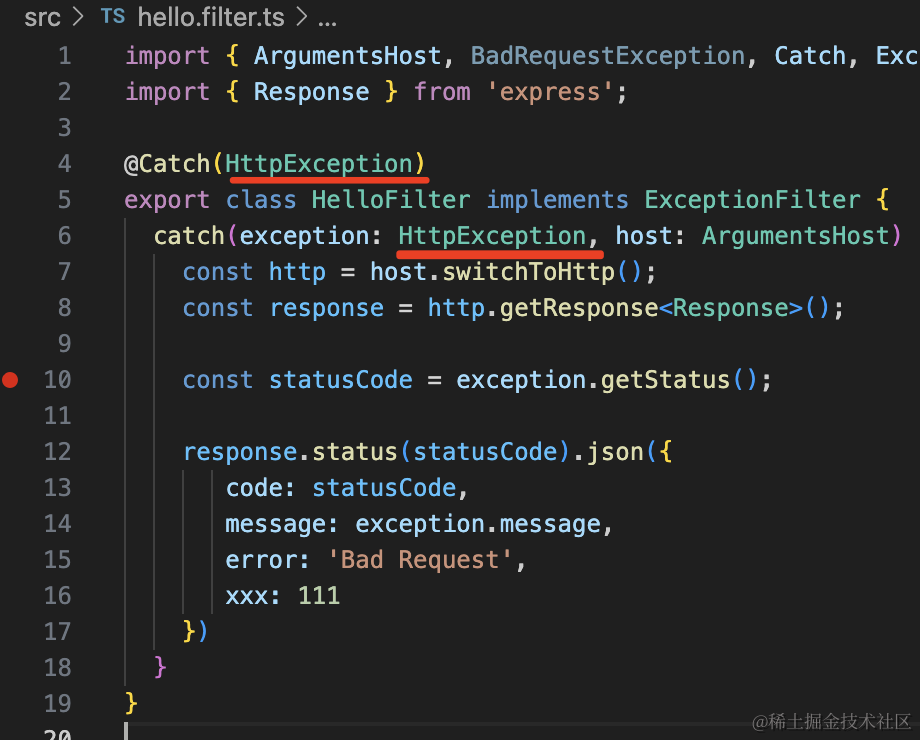
试一下:
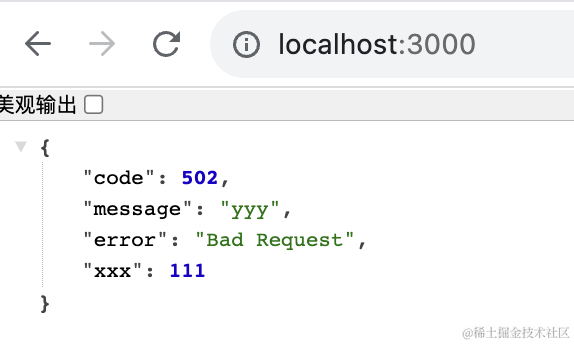
确实,现在所有的 HttpException 都会被处理了。
但其实这也有个问题。
就是当我们用了 ValidationPipe 的时候。
比如我们加一个路由:
@Post('aaa')
aaa(@Body() aaaDto: AaaDto ){
    return 'success';
}
2
3
4
然后创建 src/aaa.dto.ts
export class AaaDto {
    aaa: string;

    bbb: number;
}
2
3
4
5
安装用到的包:
npm install --save class-validator class-transformer
然后给 AaaDto 添加几个校验规则:
import { IsEmail, IsNotEmpty, IsNumber } from "class-validator";

export class AaaDto {
    @IsNotEmpty({message: 'aaa 不能为空'})
    @IsEmail({}, {message: 'aaa 不是邮箱格式'})
    aaa: string;

    @IsNumber({}, {message: 'bbb 不是数字'})
    @IsNotEmpty({message: 'bbb 不能为空'})
    bbb: number;
}
2
3
4
5
6
7
8
9
10
11
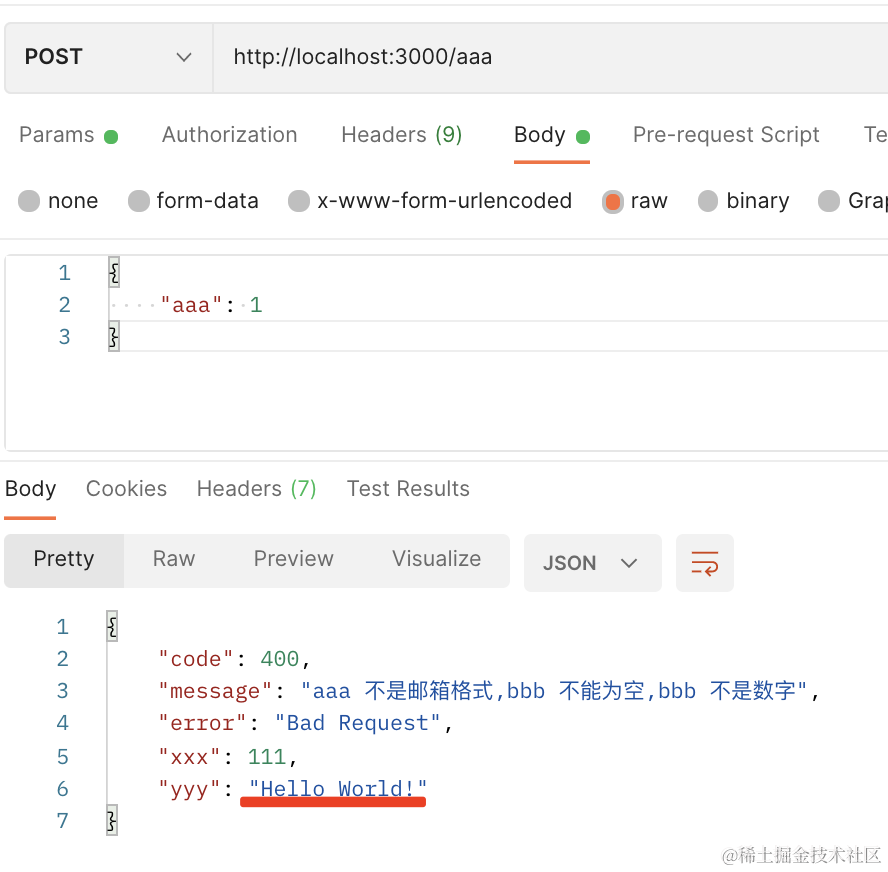
在 main.ts 启用 ValidationPipe:
app.useGlobalPipes(new ValidationPipe());
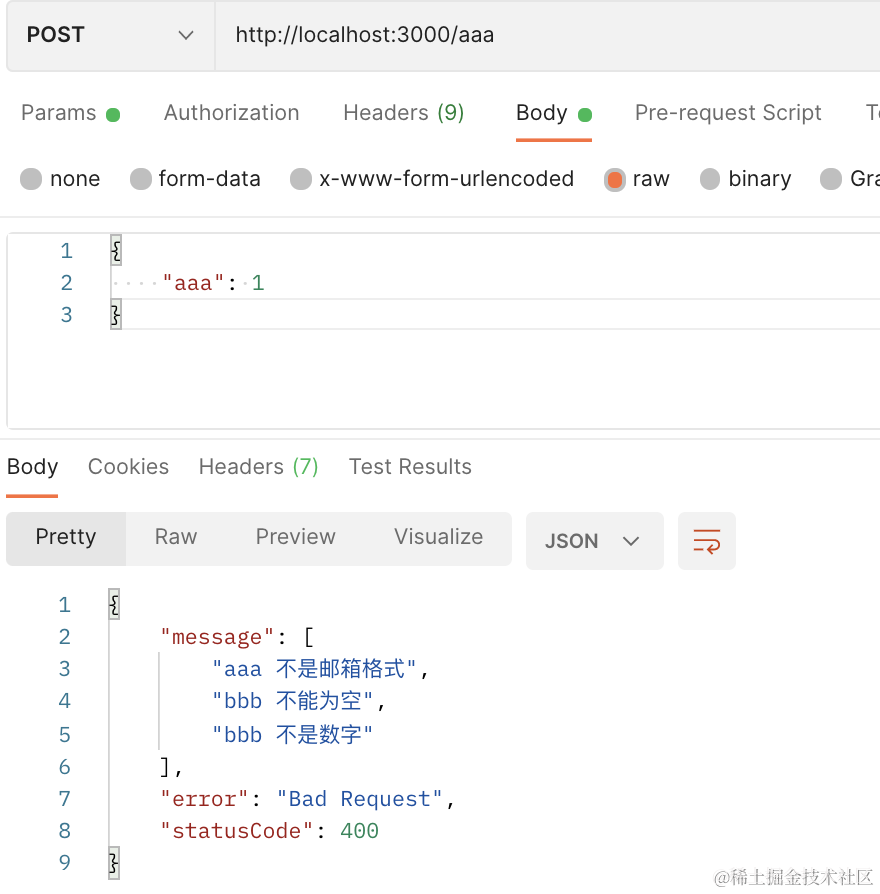
在 postman 里测试下:
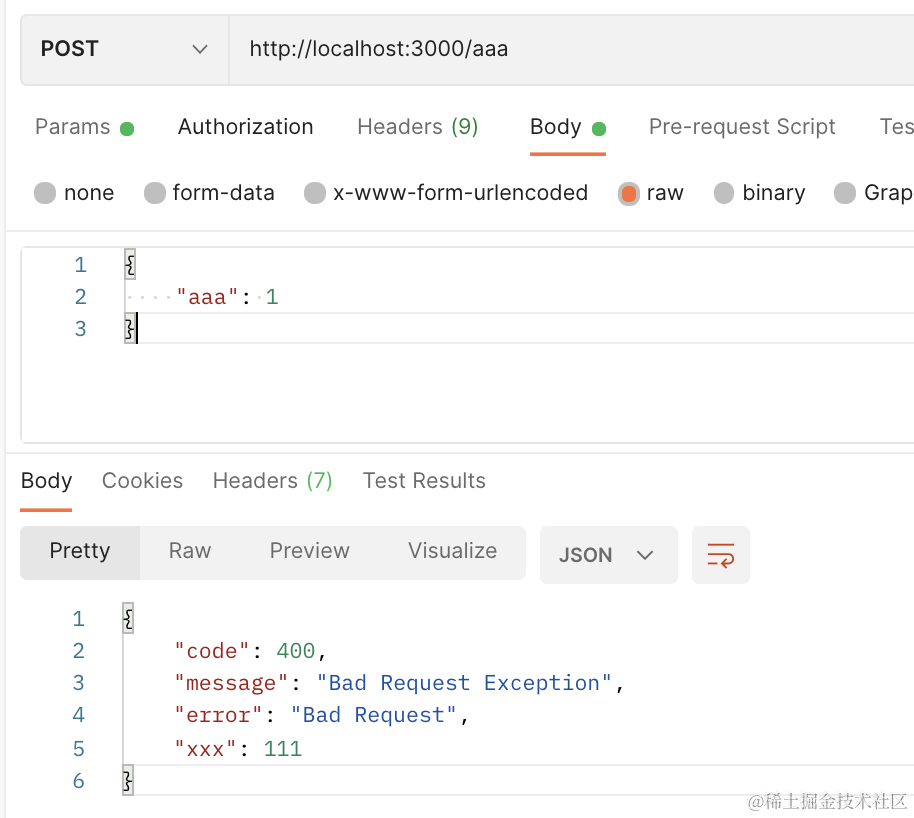
可以看到,提示的错误也不对了。
因为我们自定义的 exception filter 会拦截所有 HttpException,但是没有对这种情况做支持。
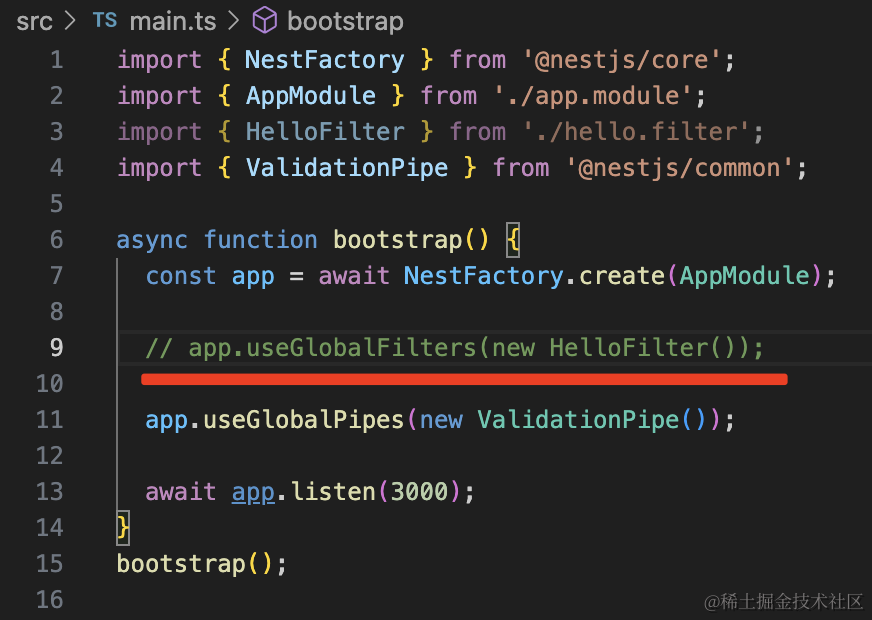
先不加这个 filter。
这时候响应是这样的:
我们对这种情况做下支持:

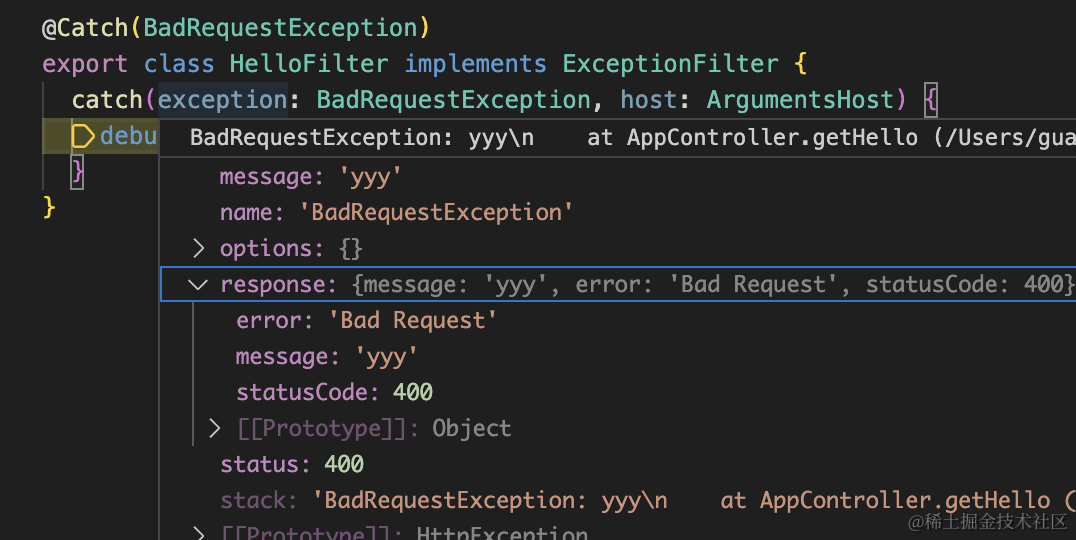
启用自定义的 filter,然后打个断点:
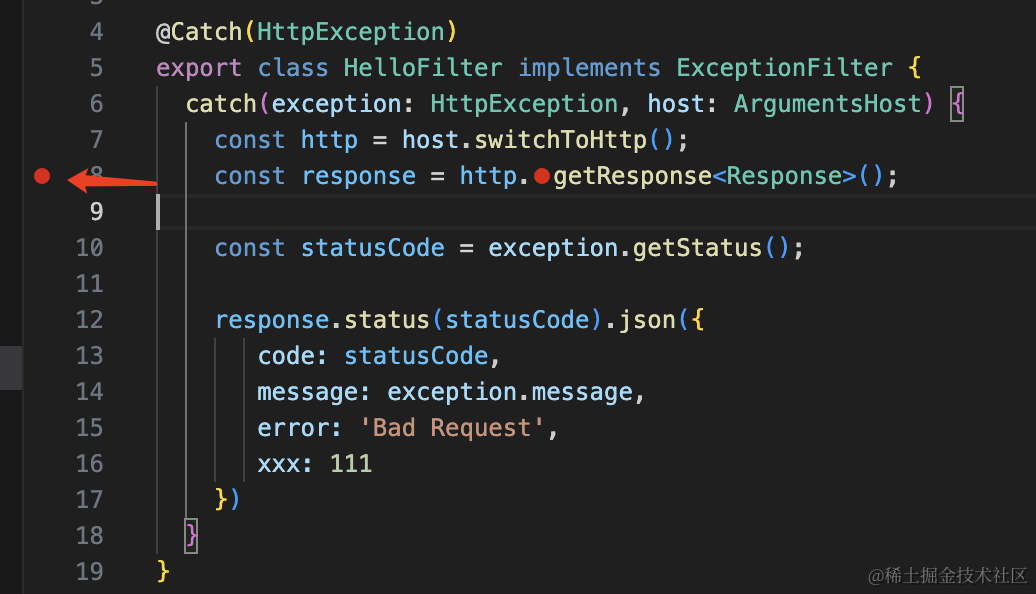
再次访问会在断点处断住:
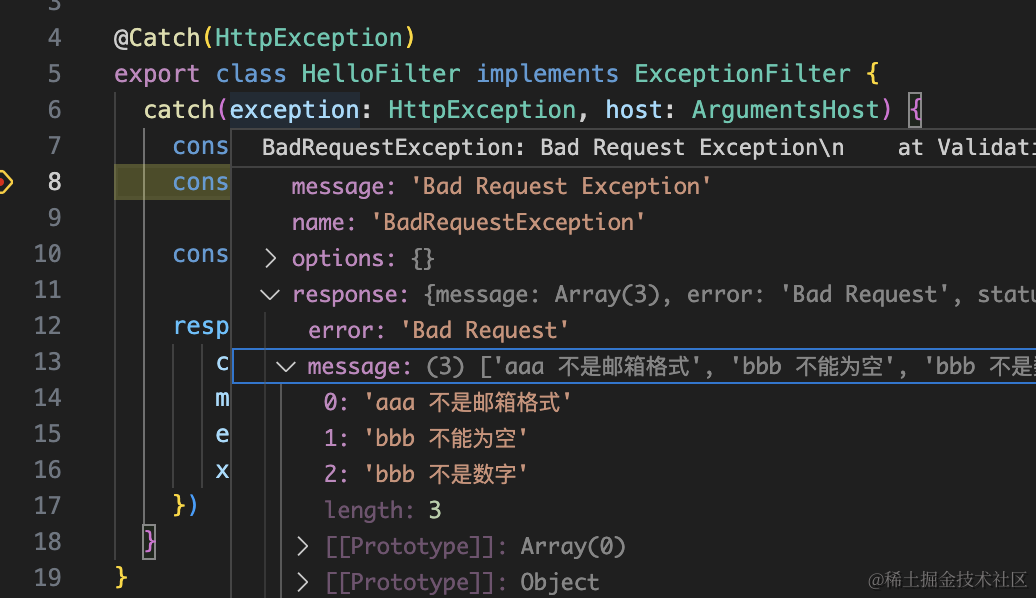
可以看到 ValidationPipe 的 response 格式是这样的。
所以我们可以这样改:
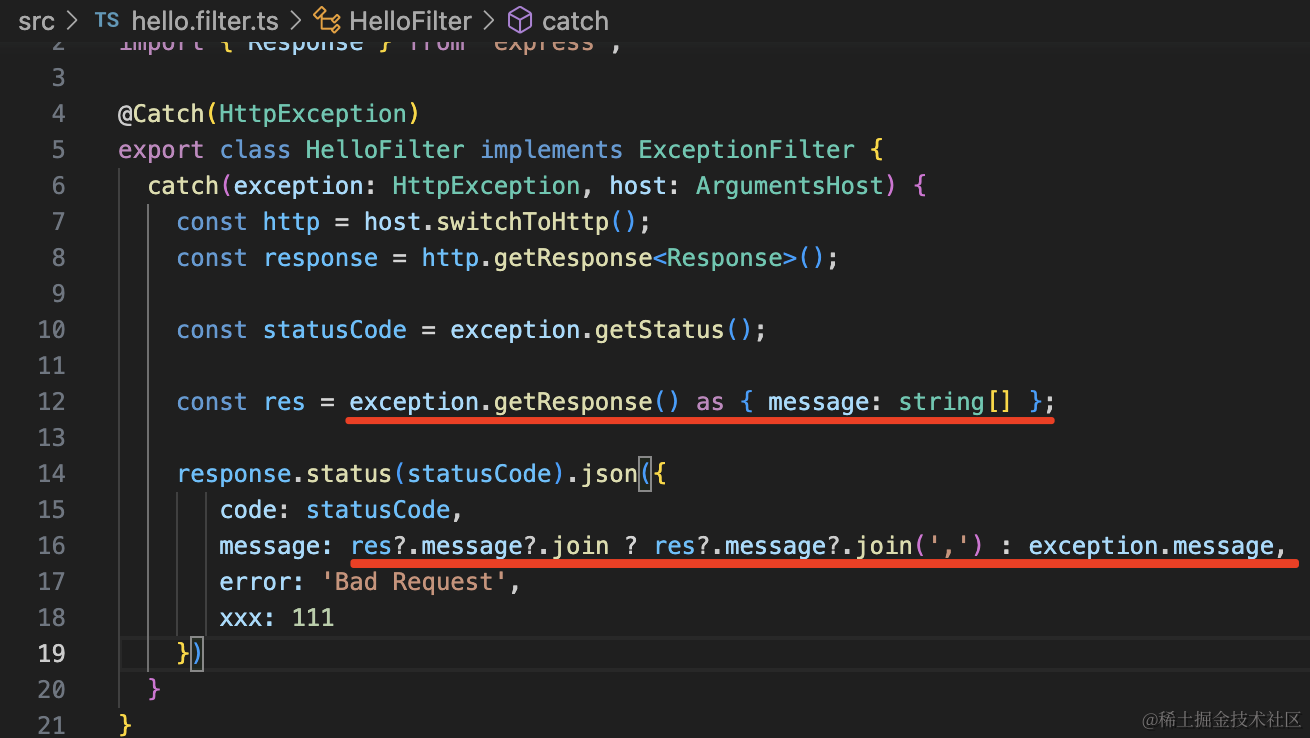
import { ArgumentsHost, BadRequestException, Catch, ExceptionFilter, HttpException } from '@nestjs/common';
import { Response } from 'express';

@Catch(HttpException)
export class HelloFilter implements ExceptionFilter {
  catch(exception: HttpException, host: ArgumentsHost) {
    const http = host.switchToHttp();
    const response = http.getResponse<Response>();

    const statusCode = exception.getStatus();

    const res = exception.getResponse() as { message: string[] };

    response.status(statusCode).json({
       code: statusCode,
       message: res?.message?.join ? res?.message?.join(',') : exception.message,
       error: 'Bad Request',
       xxx: 111
    })
  }
}
2
3
4
5
6
7
8
9
10
11
12
13
14
15
16
17
18
19
20
21
如果 response.message 是个数组,就返回 join 的结果,否则还是返回 exception.message
再试下:
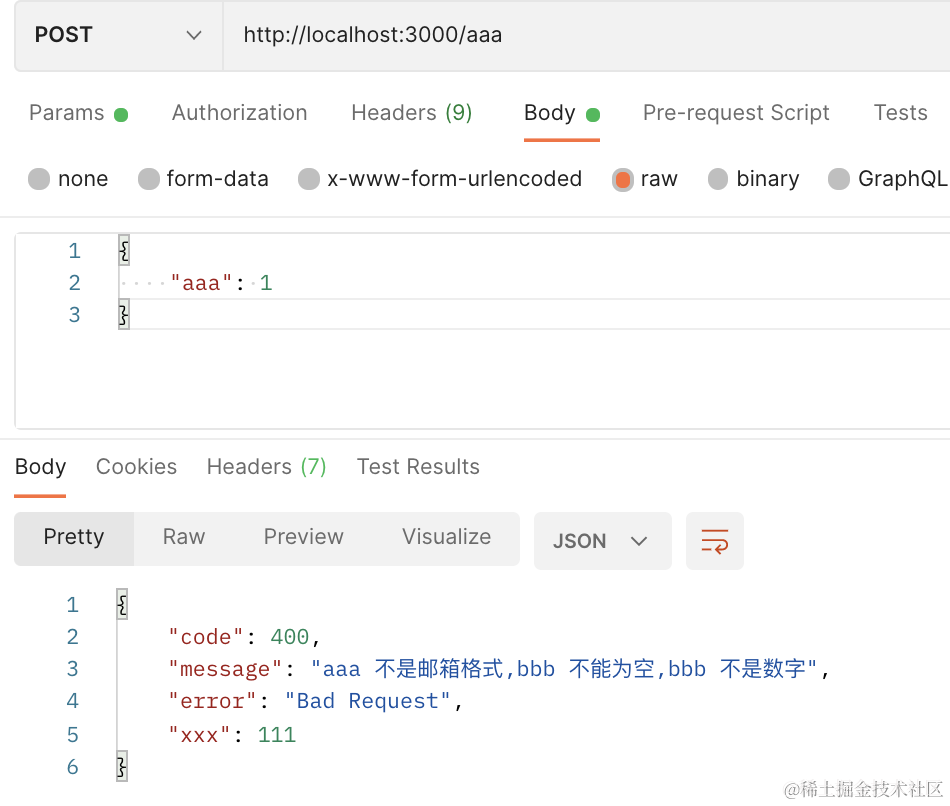
现在,ValidationPipe 的错误和其他的错误就都返回了正确的格式。
# 在 Filter 里注入 AppService
那如果我想在 Filter 里注入 AppService 呢?
这就需要改一下注册方式:
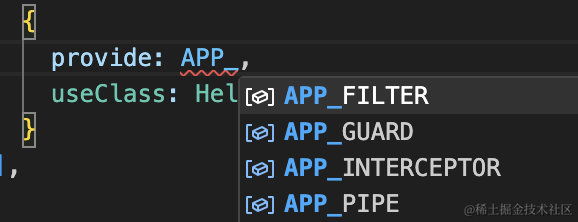
不用 useGlobalFilters 注册了,而是在 AppModule 里注册一个 token 为 APP_FILTER 的 provider:
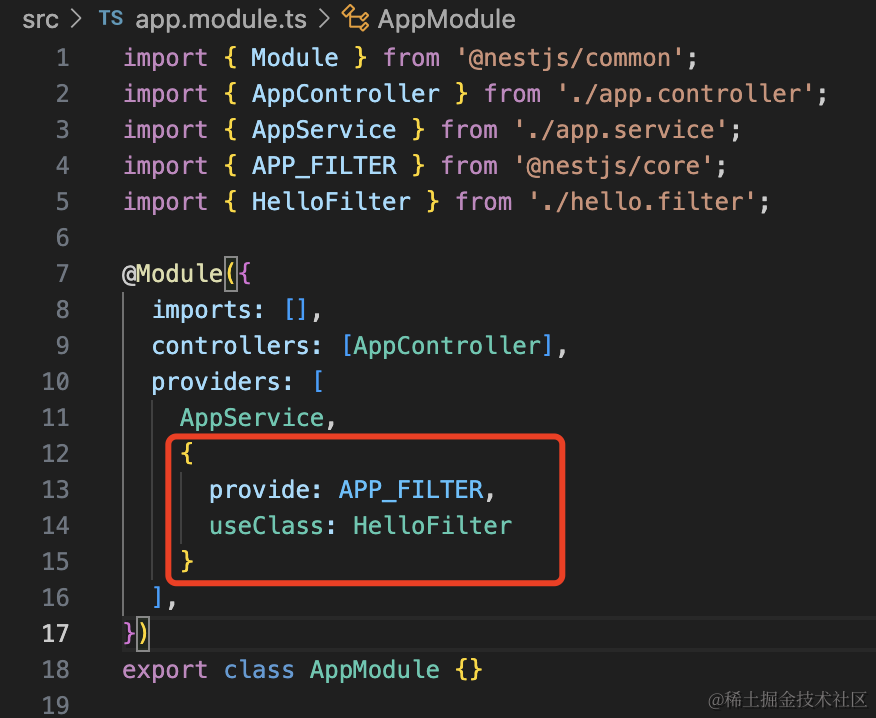
{
  provide: APP_FILTER,
  useClass: HelloFilter
}
2
3
4
Nest 会把所有 token 为 APP_FILTER 的 provider 注册为全局 Exception Filter。
注册多个 Filter 也是这么写。
其余的全局 Guard、Interceptor、Pipe 也是这样注册:
这样注册的好处就是可以注入其他 provider 了:
比如我注入了 AppService,然后调用它的 getHello 方法:

import { ArgumentsHost, BadRequestException, Catch, ExceptionFilter, HttpException, Inject } from '@nestjs/common';
import { Response } from 'express';
import { AppService } from './app.service';

@Catch(HttpException)
export class HelloFilter implements ExceptionFilter {

  @Inject(AppService)
  private service: AppService;

  catch(exception: HttpException, host: ArgumentsHost) {
    const http = host.switchToHttp();
    const response = http.getResponse<Response>();

    const statusCode = exception.getStatus();

    const res = exception.getResponse() as { message: string[] };

    response.status(statusCode).json({
       code: statusCode,
       message: res?.message?.join ? res?.message?.join(',') : exception.message,
       error: 'Bad Request',
       xxx: 111,
       yyy: this.service.getHello()
    })
  }
}
2
3
4
5
6
7
8
9
10
11
12
13
14
15
16
17
18
19
20
21
22
23
24
25
26
27
可以看到,service 方法调用成功了:
# 自定义 Exception
此外,如果你想自定义 Exception 也是可以的。
比如添加一个 src/unlogin.filter.ts
import { ArgumentsHost, Catch, ExceptionFilter, HttpStatus } from '@nestjs/common';
import { Response } from 'express';

export class UnLoginException{
  message: string;

  constructor(message?){
    this.message = message;
  }
}

@Catch(UnLoginException)
export class UnloginFilter implements ExceptionFilter {
  catch(exception: UnLoginException, host: ArgumentsHost) {
    const response = host.switchToHttp().getResponse<Response>();

    response.status(HttpStatus.UNAUTHORIZED).json({
      code: HttpStatus.UNAUTHORIZED,
      message: 'fail',
      data: exception.message || '用户未登录'
    }).end();
  }
}
2
3
4
5
6
7
8
9
10
11
12
13
14
15
16
17
18
19
20
21
22
23
我们创建了一个 UnloginException 的异常。
然后在 ExceptionFilter 里 @Catch 了它。
在 AppModule 里注册这个全局 Filter:
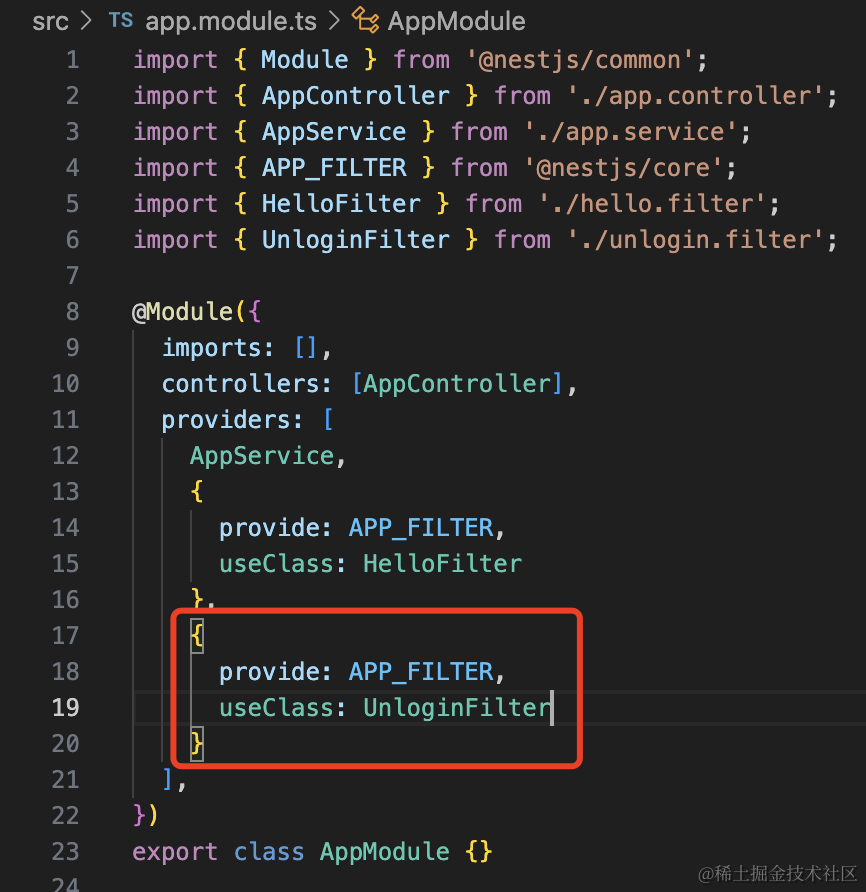
{
  provide: APP_FILTER,
  useClass: UnloginFilter
}
2
3
4
之后在 AppController 里抛出这个异常:
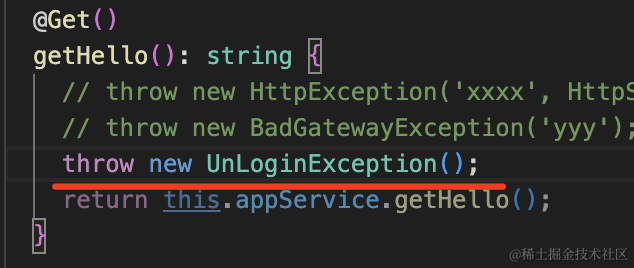
浏览器里访问下:
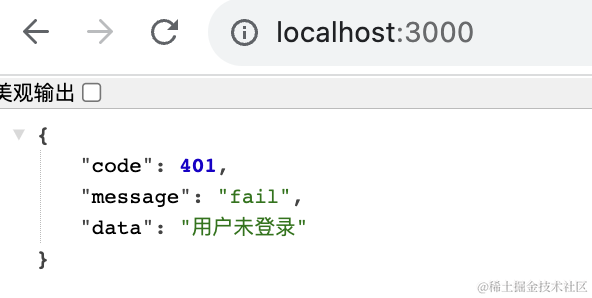
可以看到,返回的是我们自定义的格式。
也就是说,可以用自定义 Exception Filter 捕获内置的或者自定义的 Exception。
案例代码在小册仓库 (opens new window)。
# 总结
这节我们学习了自定义 Exception Filter。
通过 @Catch 指定要捕获的异常,然后在 catch 方法里拿到异常信息,返回对应的响应。
如果捕获的是 HttpException,要注意兼容下 ValidationPipe 的错误格式的处理。
filter 可以通过 @UseFilters 加在 handler 或者 controller 上,也可以在 main.ts 用 app.useGlobalFilters 全局启用。
如果 filter 要注入其他 provider,就要通过 AppModule 里注册一个 token 为 APP_FILTER 的 provider 的方式。
此外,捕获的 Exception 也是可以自定义的。
这样,我们就可以自定义异常和异常返回的响应格式了。