
 腾讯云COS和SMS的使用
# 腾讯云 COS
# 常见的几种上传方案
前端先上传到应用服务器,应用服务器再上传到
COS- 缺点就是相对于 前端直传
COS,要进行两次上传,多花费一倍的网络时间
- 缺点就是相对于 前端直传
前端直接使用密钥直传
- 虽然是直传,但是将
SecretId和SecretKey放到客户端就会有泄漏的风险,有一定的安全隐患
- 虽然是直传,但是将
STS生成临时密钥- 上传之前需调用一次接口获取临时的密钥信息,多一次的网络请求
以上方式各有利弊,如果做的是类似于企业内部使用的后台管理系统,那就无脑选前端直传吧,前后端都方便。
# 后端生成临时密钥
安装腾讯云提供的三方包
npm i qcloud-cos-sts
1
# policy 相关参数
通过它定义相应的策略(权限)

# 代码示例
默认失效时间是 1800 秒,可以指定 durationSeconds设置失效时间
async getSTSConfig() {
  const { userId } = await getHeaderAuthInfo<TokenPayloadType>(
    this.jwtService,
    this.ctx.get('authorization')
  );
  const { SecretId, SecretKey, Bucket } = this.cosConfig.default;

  try {
    const result = await STS.getCredential({
      secretId: SecretId,
      secretKey: SecretKey,
      // durationSeconds
      policy: {
        version: '2.0',
        statement: [
          {
            action: ['name/cos:PutObject'],
            effect: 'allow',
            resource: [
              `qcs::cos:ap-beijing:uid/12***87**90:${Bucket}/web/avatar/${userId}/*`,
            ],
          },
        ],
      },
    });
    return result;
  } catch (error) {
    throw new DefaultError('生成 cos sts 失败');
  }
}
1
2
3
4
5
6
7
8
9
10
11
12
13
14
15
16
17
18
19
20
21
22
23
24
25
26
27
28
29
30
2
3
4
5
6
7
8
9
10
11
12
13
14
15
16
17
18
19
20
21
22
23
24
25
26
27
28
29
30
resource
- 通过设置
userId,我们指定了一个用户只能操作它当前userId下面的文件,以此来防止出现越权访问 uid后面对应的是APPID,大家根据自己的账号填上即可
action
指定了相应的 action,对应着前端就有了相应的调用权限。
比如我们在这里只指定了 name/cos:PutObject,对应前端那就只可以调用 cos.putObject这个方法。
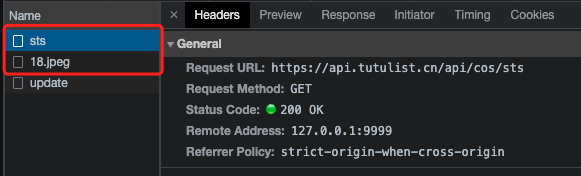
# 前端调用
# 接口请求
- 上传之前先调用
/api/cos/sts接口,获取临时密钥,默认时效时间 1800 秒; - 安装
COS SDK,调用cos.putObject进行上传
# 前端代码
<script setup lang="ts">
import COS from "cos-js-sdk-v5";

import { getCosConfig } from "@/service/upload";

const beforeUpload = async ({ file }: { file: UploadFileInfo }) => {
  const fileInfo = file.file;
  if (fileInfo) {
    const fileTypeList = ["image/jpg", "image/png", "image/jpeg"];
    const isLt2M = fileInfo.size / 1024 / 1024 < 2;

    if (!fileTypeList.includes(fileInfo.type)) {
      window.$message.warning("仅支持 png、jpg、jpeg");
      return false;
    }

    if (!isLt2M) {
      window.$message.warning("上传大小不能超过 2MB!");
      return false;
    }

    const { code, data } = await getCosConfig();
    if (code === 200) {
      cosConfigInfo.value = data;
      return true;
    }
  }
  return false;
};

const customRequest = async (info: UploadCustomRequestOptions) => {
  const { file, onFinish } = info;

  const cosConfig = {
    SecretId: cosConfigInfo.value.credentials.tmpSecretId,
    SecretKey: cosConfigInfo.value.credentials.tmpSecretKey,
    XCosSecurityToken: cosConfigInfo.value.credentials.sessionToken,
    StartTime: cosConfigInfo.value.startTime,
    ExpiredTime: cosConfigInfo.value.expiredTime,
  };
  const userId = globalStore.userInfo?.id;
  if (file.file && userId) {
    const cos = new COS(cosConfig);
    const Bucket = VITE_COS_BUCKET;
    const fileNames = file.name.split(".");
    const fileType = fileNames[fileNames.length - 1] || ".png";
    const res = await cos.putObject({
      Bucket,
      Region: "ap-beijing",
      Key: `${DIR}/${userId}/${userId}.${fileType}`,
      StorageClass: "STANDARD",
      Body: file.file, // 上传文件对象
    });

    if (res?.statusCode === 200) {
      window.$message.success("上传成功");
      userInfo.avatar = `https://${res.Location}`;
      onFinish();
    }
  }
};
</script>

<template>
  <n-upload
    :on-before-upload="beforeUpload"
    class="flex justify-center"
    accept=".jpg,.png,.jpeg"
    :show-file-list="false"
    :custom-request="customRequest"
  >
    <n-avatar
      v-if="userInfo.avatar"
      class="cursor-pointer"
      round
      :size="70"
      :src="userInfo.avatar"
    />
    <n-avatar v-else round :size="70" class="cursor-pointer">
      <n-icon>
        <UserIcon />
      </n-icon>
    </n-avatar>
  </n-upload>
</template>
1
2
3
4
5
6
7
8
9
10
11
12
13
14
15
16
17
18
19
20
21
22
23
24
25
26
27
28
29
30
31
32
33
34
35
36
37
38
39
40
41
42
43
44
45
46
47
48
49
50
51
52
53
54
55
56
57
58
59
60
61
62
63
64
65
66
67
68
69
70
71
72
73
74
75
76
77
78
79
80
81
82
83
84
85
2
3
4
5
6
7
8
9
10
11
12
13
14
15
16
17
18
19
20
21
22
23
24
25
26
27
28
29
30
31
32
33
34
35
36
37
38
39
40
41
42
43
44
45
46
47
48
49
50
51
52
53
54
55
56
57
58
59
60
61
62
63
64
65
66
67
68
69
70
71
72
73
74
75
76
77
78
79
80
81
82
83
84
85
# beforeUpload
文件上传之前的回调
在该方法中去验证文件格式、大小,并调用接口获取临时 token
# customRequest
自定义上传的方法
在该方法中实例化 COS,调用 cos.putObject 进行头像上传。头像上传成功后获取到该图片在 COS 中存储的 URL 地址。
前端拿到此 URL 地址进行图片展示。当用户点击保存时,最终将这个 URL 地址保存到自身的业务系统中。
# 腾讯云 SMS
# 申请签名
短信服务签名的审核比较严格,对于网站来说需要提供可访问的域名,并且该域名已经备案,这就和面试卡学历一样,硬性要求。阿里云也一样
# 申请模板
模板相对来说就好申请一点了,但是如果签名没申请下来,只有一个模版也没啥用
# 编写 Sms 工具类
对于像 client 这种工具,我们使用 单例模式 去创建一个工具类。
import { Context } from '@midwayjs/koa';
import { Inject } from '@midwayjs/decorator';
import * as tencentcloud from 'tencentcloud-sdk-nodejs';
import { DefaultError } from '@/error/default.error';

import SMSKEY from './key';
export class Sms {
  @Inject()
  ctx: Context;

  private static instance: Sms;

  private smsClient: any;

  private constructor() {
    const SmsClient = tencentcloud.sms.v20210111.Client;
    this.smsClient = new SmsClient({
      credential: {
        secretId: SMSKEY.SMS_SECRET_ID,
        secretKey: SMSKEY.SMS_SECRET_KEY,
      },
      region: 'ap-guangzhou',
      profile: {
        httpProfile: {
          endpoint: 'sms.tencentcloudapi.com',
        },
      },
    });
  }

  public static getInstance() {
    if (!Sms.instance) {
      Sms.instance = new Sms();
    }
    return Sms.instance;
  }
  /**
   * @param mobile 手机号
   * @param code 验证码
   * @param templateId 腾讯云对应的短信模版 id
   */
  async sendSms(mobile: string, code: string, templateId: string) {
    const params = {
      SmsSdkAppId: SMSKEY.SMS_SDK_APP_ID, // app id
      SignName: SMSKEY.SMS_SIGN_NAME, // 签名名称
      TemplateId: templateId, // 模版id
      PhoneNumberSet: [mobile], // 手机号,可以发送多个人
      TemplateParamSet: [code], // 具体的验证码内容
    };
    /**
     * 调用是会消耗短信额度的,建议调通之后,就把下面代码注释掉,直接返回 true 发送成功
     * 需要登录的时候直接去 Redis 取
     */
    try {
      const smsClient = Sms.getInstance().smsClient;
      const { SendStatusSet } = await smsClient.SendSms(params);
      const smsResult = SendStatusSet && SendStatusSet[0];
      if (smsResult.Code === 'Ok') {
        return true;
      } else {
        this.ctx.logger.error(
          '$s %j',
          `腾讯云sms发送失败, ${smsResult.Code}`,
          params
        );
        throw new DefaultError(smsResult.Code);
      }
    } catch (error) {
      throw new DefaultError(JSON.stringify(error));
    }
  }
}
1
2
3
4
5
6
7
8
9
10
11
12
13
14
15
16
17
18
19
20
21
22
23
24
25
26
27
28
29
30
31
32
33
34
35
36
37
38
39
40
41
42
43
44
45
46
47
48
49
50
51
52
53
54
55
56
57
58
59
60
61
62
63
64
65
66
67
68
69
70
71
72
2
3
4
5
6
7
8
9
10
11
12
13
14
15
16
17
18
19
20
21
22
23
24
25
26
27
28
29
30
31
32
33
34
35
36
37
38
39
40
41
42
43
44
45
46
47
48
49
50
51
52
53
54
55
56
57
58
59
60
61
62
63
64
65
66
67
68
69
70
71
72
使用
发送成功后,通过调用 setRedisInfo将验证码存入 redis
async sendCode(mobile: string, type: keyof typeof SmsTemplateIdEnum) {
  const code = getRandomCode();
  try {
    const client = Sms.getInstance();
    await client.sendSms(mobile, code, SmsTemplateIdEnum[type]);

    const redisKey = `${UserKeyEnum.SMS_REDIS_KEY}${mobile}`;
    // 设置60秒有效期
    const isSave = await setRedisInfo(
      this.redisService,
      redisKey,
      code,
      'oneMinute'
    );
    if (!isSave) {
      this.ctx.logger.error(
        `redis验证码保存失败: redisKey: ${redisKey}, value: ${code}`
      );
      throw new DefaultError('验证码发送失败');
    }
    return '验证码发送成功';
  } catch (error) {
    this.ctx.logger.error('验证码发送失败', error);
    throw new DefaultError('验证码发送失败');
  }
}
1
2
3
4
5
6
7
8
9
10
11
12
13
14
15
16
17
18
19
20
21
22
23
24
25
26
2
3
4
5
6
7
8
9
10
11
12
13
14
15
16
17
18
19
20
21
22
23
24
25
26